Showing posts with label childrens clothes. Show all posts

Wednesday, August 22, 2012

Peacocks and Paisleys - Naney's Birthday dress

My niece Naney turned three recently and I made her a birthday dress!!
I made a test run in the spring- the Puppies And Kitties Dress.  I made a couple  of changes to the fit: lowered the armscye, took  in an inch at the neck so it didn't gape and made it longer. And it is perfect!
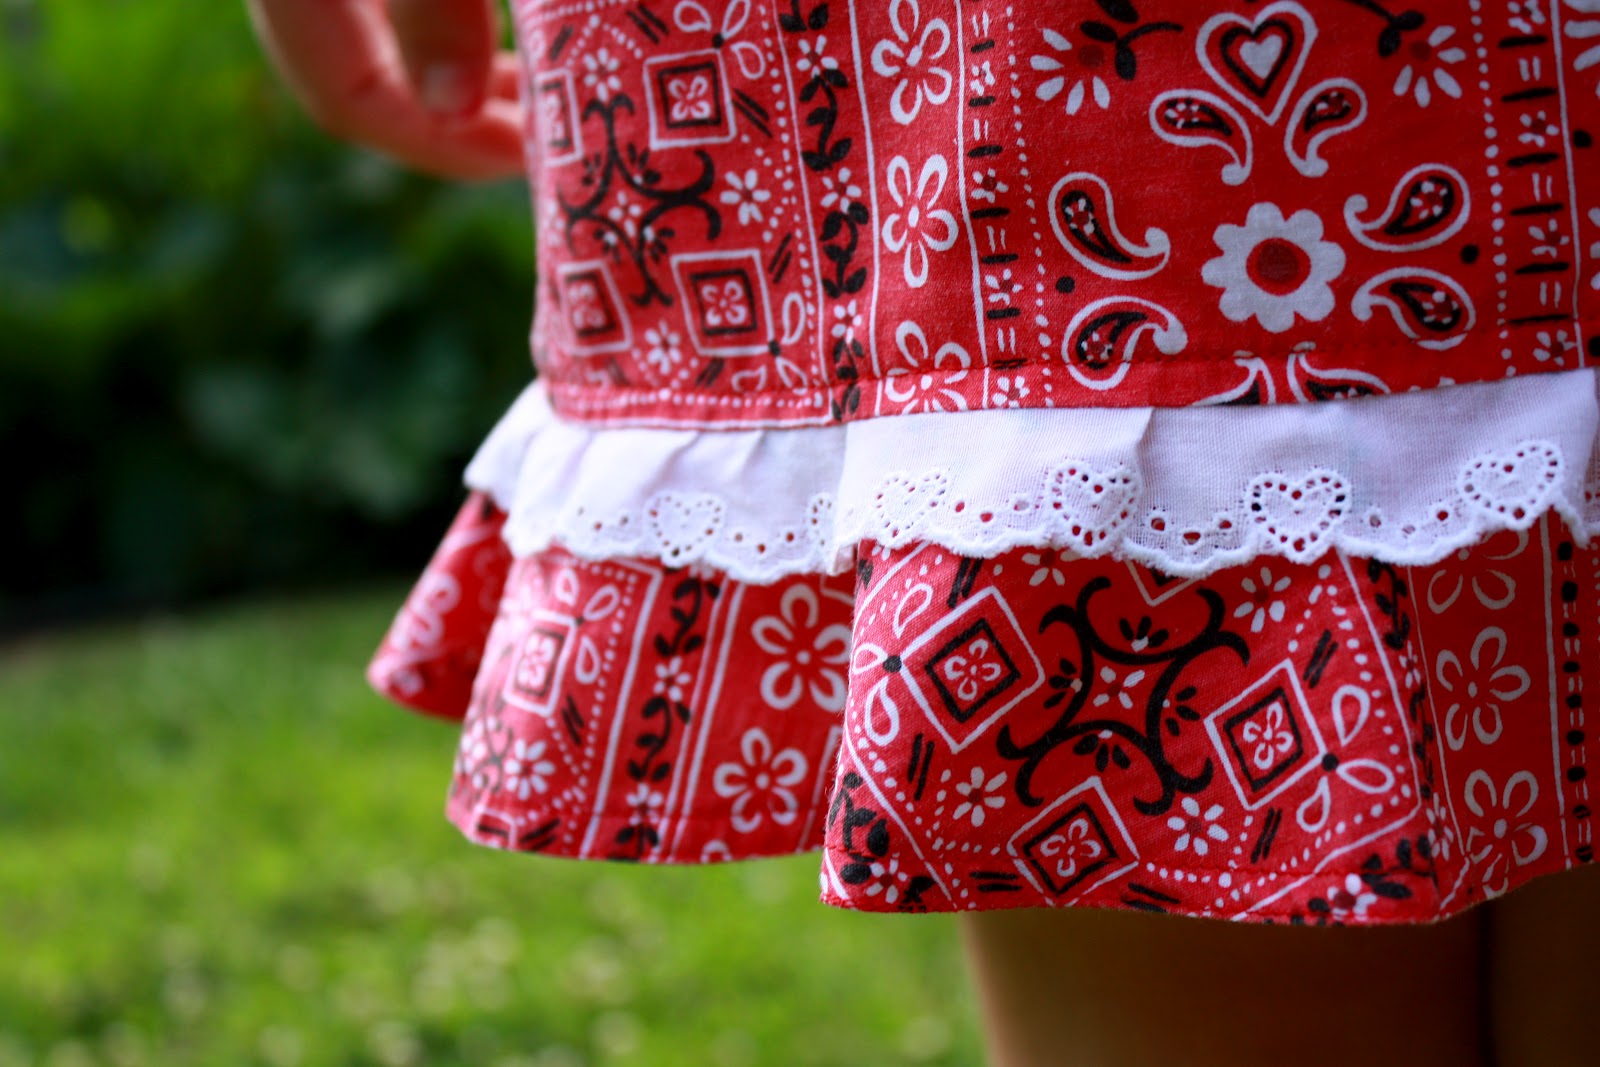
 I used the Olivia's Best Dress as a base for this dress. I used the little ruffle sleeves from another toddler dress and the band at the bottom of the bodice idea from the Bebe dress. I  call this Franken-sewing; mixing and matching pieces from different patterns. 

The Olivia dress calls for using 7 fat quarters. I couldn't find enough  co-ordinating fat quarters so I had  to get a couple of the fabrics in half yards. That worked out better as I had more freedom in choosing what fabric went where. 
On vacation this summer I asked Naney what her favorite color is. I wanted to make the dress in her favorite color. Well, it was green one day and then  purple the next. On the last day at the beach she leaned over to me and whispered that her favorite color was red!  So with these fabrics, no matter what her favorite color is that day,  it is on her dress! :)
These fabrics can also be worn at any time during the year. With the lower armscye, Naney can wear her dress over t-shirts or even turtle necks in the winter.  And these colors will be so cute in the spring!

 
My favorite fabrics on the dress were the peacock fabric and the paisley.


I put a label in the dress so she knows when it was made just for her. On vacation this year, she accidentally called me Uncle Stacye, and it stuck.  I think it is adorable! I will happily be Uncle Stacye! :) :) 
So I put that in the label too!  How fun when she is bigger to have her little funny sayings inside her clothes. 
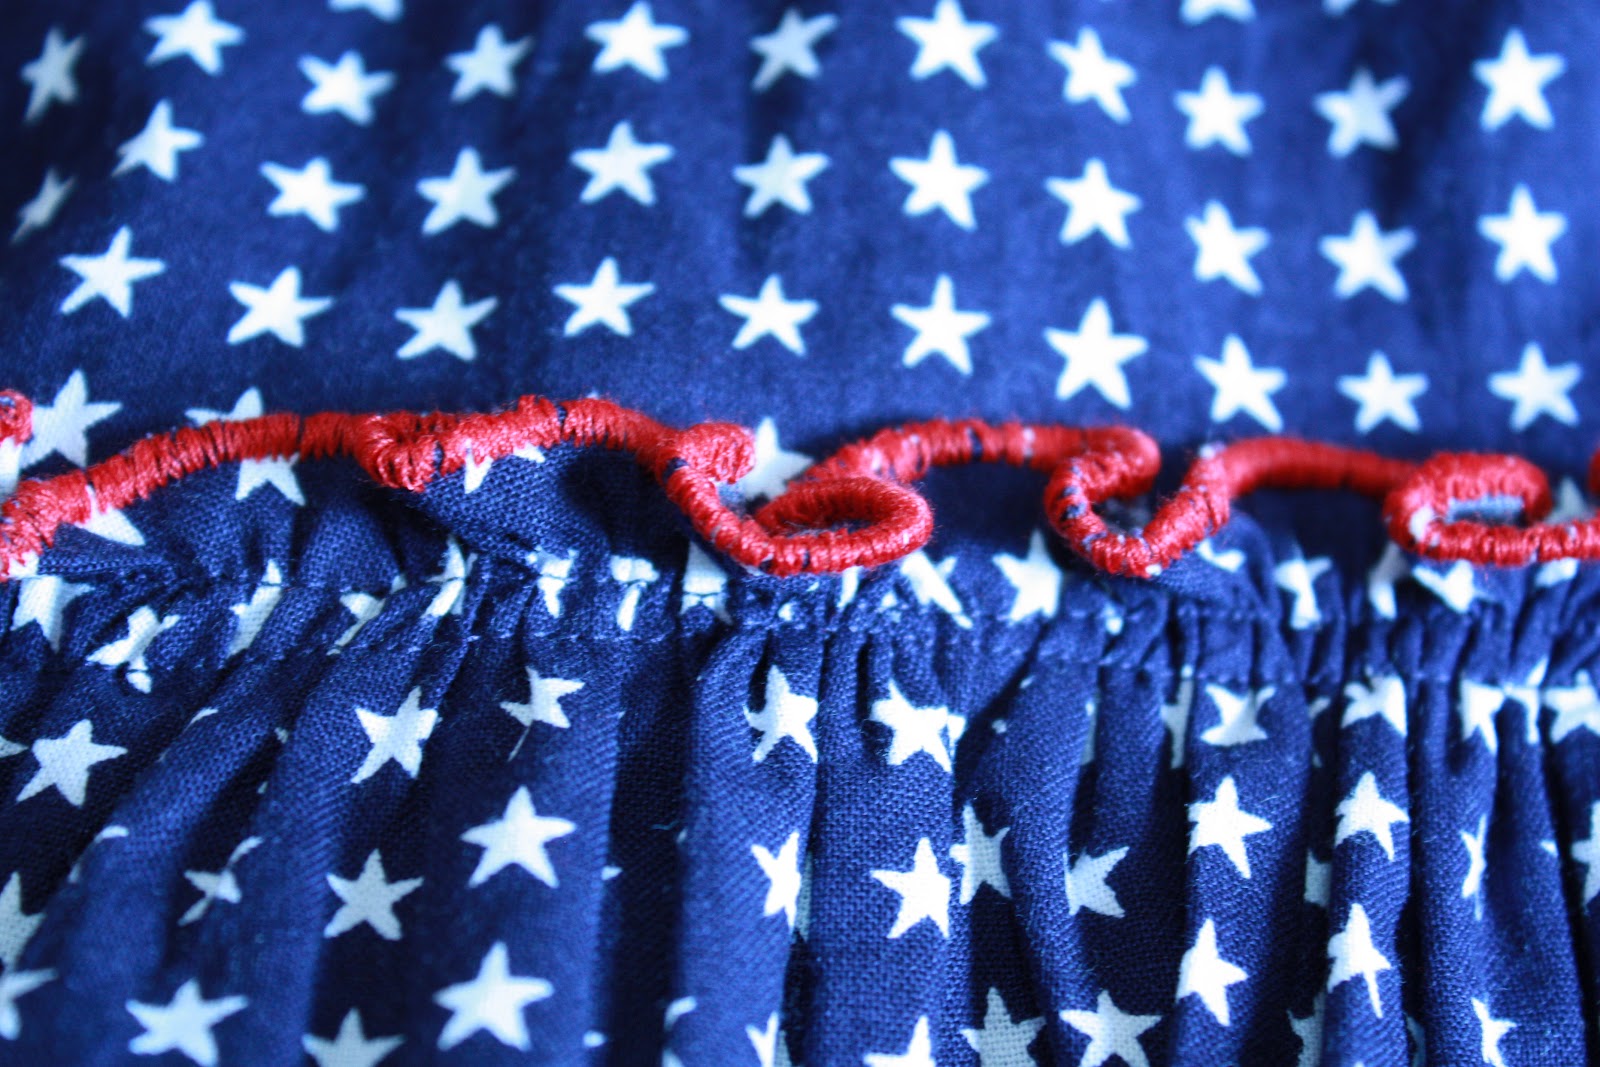
The neckline is topstitched in a fun swirly stitch. This helps to keep the lining in place. 


The bottom hem is also  topstitched in a decorative stitch. It is hidden in some of the busier fabrics but you can see it pretty well here on the stripe.

Here is the inside. I stitched the strips together with a small seam allowance, trimmed it and then zigzagged over them together.  This should help the dress not need to be ironed as much- no seams to press open.   


 The little sleeves are so easy to create on little  dresses and top. Draw a large oval. Press it in half lengthwise.  Run a gathering stich along the raw edge- gather and insert!

I had a couple of people ask me how long it took to make this dress. It  looks like it is a time consuming dress but it really isn't. I have made a bunch of this style dresses and so I have the order of construction down pat.   Putting the skirt together is all straight stitches and  zig zags,  and it went by pretty past. 
I would say this dress took about 4 hours. it took longer to choose what fabrics to use!

 Here is the birthday girl modeling  her dress!!!

Spinning around....

Go me- it's my birthday! Go me!

Happy Birthday to me!


 All that twirling makes you thirsty! Gotta have a juice box!
I love the look of total concentration,  trying to get the straw inserted in the box.

Happy Birthday Naney!

Tuesday, July 31, 2012

All American Girl


My Mom-in-law found the cutest 4th of July dresses  for the grandbabies summer picture.  Each year  on vacation we are taking pictures of the girls in matching outfits. She couldn't find a dress that matched in  Eden's size, so I made one!  ( Last year I made all three outfits, this year was much easier. Hooray! :) ) 
I took a picture of the baby's dress, then hunted down the right  fabrics. Sounds easy enough to find  navy & white stars and red & white stripes, right?  No, not really. They were a bit elusive  but I finally found the exact matches online. 

This is the baby's dress.

I used this pattern AGAIN. I know this pattern now inside & out, backwards and forwards. I have made 5 or 6 versions of this now. It is  so easy to alter and change up, each version looks different!  Eden loves each version , they have been her favorite for two years now.   When she grows out of this, we are going to have a crisis- what pattern will we go to for everything???


On July 4, Eden and I went to Michael's in search of ribbons  to put on the straps. They had nothing- we wanted stars and stripes and crazy  patriotic ribbons but it was all gone. They put it out so early and then it is all gone by the holiday.  I guess you have to get your July 4 stuff around Valentines Day. 
 (Halloween is out right now, people. It is July.  Halloween!)
We found navy ribbons and red ribbon  in the regular ribbon aisle and that had to do. 


The inside is lined in plain white cotton. I think it might even be white drapery lining...  Rock on Roclon Drapery Lining! I always have small cuttings of drapery lining hanging around. When  washed, drapery lining  does great as a clothing lining.  I didn't want to use the stripe to line it as I didn't want the stripe show thought the fabric on the outside.


Lining up the stripes was fun. I pinned at each stripe and sewed sloooooooowly. The entire bodice is topstitched  at the top edge to give it more structure. 


The ruffle was attached to the dress on the outside.  There is  about 170 inches of ruffle on the bottom edge of this dress!!!   I thought it might be too much, as I was gathering it, but Eden loves it. It is her favorite part of the dress. 
To look just like the babies dresses, I satin stitched the top edge of the ruffle in red thread. I used a short length zig zag and went over it like 8 times, around and around and around the ruffle loop. That took  forever- maybe an hour and a half. But it felt like forever, sitting there zig zagging and zig zagging and zig zagging.... 
I gathered it and attached it to the bottom of the dress skirt with two rows of stitching.  One row just didn't seem like it was going to hold up that insane amount of ruffle! 


 This is the underneath of the ruffle- I attached it to the skirt  and then just zig zagged the bottom edge of the skirt to keep it from unraveling. 
The bottom edge  of the ruffle is a rolled hem . I used the  1/4 inch size rolled hem foot.  

Here is Eden  on the deck in Nag's Head. 

My shy girl. 


The back of the dress

On the straps, I used an heirloom stitch on my machine and a wing needle. I thought it kinda looks like fireworks !
The ribbons on the straps , meant to match the little ones dresses, actually cover up a booboo. I tried to get the straps sewn on so that the stripes  went in the right order, meaning the top row of the bodice is a white stripe so the first stripe showing on the straps should have been red. Uhm.....it didn't go quite like that. After re-doing it three times after it came out crooked or on the white stripe not the red,  I said  something like "to heck with this" only a little less PG . 
I put ribbons and a button over it and done! You can't tell underneath is all crazy crooked stripes of the wrong color. :) :) !!!!
I did make this dress about an inch  big around her chest. I would like for her to get to wear it next year too.  I ended up spending a good chunk of time on a dress she has worn....3 times. By making it just a tad big, she might be able to wear it three times next year!  


So, how did the picture of all the babies turn out, you ask?
Here is the best picture!
Molly is the little one being held up by Eden and Naney is standing next to Eden. Aren't they adorable?
The ribbons on E's dress didn't end up in the photo but other than that- how cute is this??


It is extremely difficult getting a good shot of multiple babies.  They just don't get the picture taking process. "You mean you want me to stand still and smile and look at the camera? Aunt Stacye, you're so  funny!" We just wanted one picture of them all together, looking in the same-ish direction.  The photo above is the winner: all the girls in one photo, looking sort of at me.  I also got some cute, cute shots of the  girls  in their dresses looking everywhere but at me, and running in every direction!

I  love this photo- Naney is trying to grab Molly's hand and
  Molly is just trying to get back to her mommy.
 Eden is trying her best to herd the sweet
 little baby sheep together so I can take the picture!


This is my favorite photo of my baby. 
My all american girl with a gorgeous summer smile!! 


Happy Summer! 


Monday, July 2, 2012

The Red Dress of Summer


Eden and I made a dress back in March for her to wear on spring break when we went to Tennessee. It has become her favorite dress!  I picked the fabric- I thought this bandana fabric was  just perfect for Tennessee. Eden chose the pattern. Shake it up is  one of her favorite Disney shows and she went nuts that there was a pattern. Went totally bonkers, actually. I told her I had seen it in the pattern book and she was so upset that I didn't buy it. So next time Simplicity was on sale, I got one for her.  

We made version C. We moved the elastic from where the pattern has it
 at natural waist, to an empire waist. 


Here is the whole dress. Eden is standing in front of our garden, in front
of the mutant zucchini and squash plants.  


Back view. That is my hubby in the background , weeding :) 

Eden cut out the pattern all by herself!!
Eden cut the pattern out, cut the fabric and did about 1/2 the sewing. I did the harder stuff (what she considers harder like the ruffle and the flounce and the top stitching) 


Sophia and I supervised Eden cutting out the pattern 


Bottom Hem .   Eden and I love the cute cotton lace with hearts. 


Eden wanted the cotton lace on the straps, too.  It makes a cute addition!
 This pattern had some  issues in the instructions. It  left out the last steps completely. I think someone at Simplicity saw popularity of the show and acted quick to get the pattern our while there is a demand- but they forgot to proofread it!   
We  plan on making more of these dresses. It is very quick to put together and  Eden loves how comfortable it is.  Since spring break Eden has worn this dress weekly. Now that it is hot as everything here ( 95 today - heat index over 100 ) she  loves it as it is light and cool. 

Eden is wearing her red dress in Tennessee on The Square in Lynchburg  . She is kissin' Belle. 


Eden and I are in Lynchburg Cemetary in the Bedford section.  'cause we're Bedfords.
I am wearing my Jasmine blouse.

@ mile post 6.5  On the way to Nags Head.  June 2012


I asked Eden if she had any messages to give ya'll. She said just to say that she loves her dress-
and  Peace!


Friday, June 22, 2012

Some Girls are Bigger Than Others

  I found this pattern thrift shopping with Eden the other day- isn't it adorable? It would just look amazing on Eden in a red velour for christmas.  Look at the dress on the left, in blue. How cute in red with a white collar edged in lace? 
(I haven't even  made our Halloween costumes yet and I am already planning her christmas dress!)
 I put the pattern in the sewing room when we got home and went about my day.  Later I looked closer at the pattern, checking for pattern pieces and I noticed something funny.
 Do you see it?  
Look in the upper left corner. 


Here I will enlarge it   for you.

Suitable for Chubbies!


Uhm... What?  Chubbies?  
 Inside the pattern are instructions  on Fitting Chubby Girls.    Seriously.   
At first I was incredulous  that that was even printed on there.  But some girls are bigger than others.   Everything is so PC these days, it seems so insulting to call someone a chubbie, even indirectly on a pattern envelope.   Then I got to thinking. If  patterns would just print that kind of information on each pattern smack dab  on the front  and not worry about offending anyone , it would make things easier.  Honest and  up front.  No sugar coating.

Here are some I would like to see:

Hides a Muffin Top
Suitable for Fat Bottomed Girls
Not suitable over 40. No exceptions. 
  Only Suitable for Bulimic Models  
Suitable for  Boob Jobs
Suitable for Shorties
  or  more PC
Suitable for the Vertically Challenged


Can you think of any more?? 

Send them to me and I will add them!
:)


Sunday, June 10, 2012

Nina's Amazingly Awesome Dress

I MADE MY DRESS!!!!!!

Yesterday was Nina's last lesson  with me. She is moving next week. She has taken lessons with me for 2.5- 3 years.  She started with me when she was so small- now she is 13 and my height!  She  was one of the first  students I had when I first opened up my business.  I am going to miss her- she is a super creative, smart, interesting,  genuinely nice kid.   Her parents hope to move back to this area in a few years and  I really hope this happens! I would love to help Nina make her prom dress in high school! 

My business benefits from the flow of military folk coming through  the area. I always have new students. But sometimes it's a real bummer because I meet the coolest people   and then they move away. I 'm talking to you, Kristi. And Amy , Samantha. and Amanda and the rest of ya's that have moved away.  And now  Nina and her  mom Doris are moving. Stop it people. Just stop the moving.  Or you can move but you still have to come back often to see me for lessons! :)


 Nina wanted to make a summer dress for her final project with me.  She had a drawing she had done of her ideal dress and I found a pattern in my stash that matched it!   We used this pattern: 


I have used this pattern a few times to make dresses and tops for Eden.  Here she is in a  couple of them last summer:

Eden wears all of them often, she likes them as they are very cool  in the summer heat  and super comfy. 

 Nina  first made a muslin   of the dress. We made it out of plain purple cotton so that she could wear it instead of actual muslin.  We made it shirt length to test it out.  It went very well, fit perfect and  her mom says that she wears it to death! 
I knew that this dress  would fit,  I wanted her to make a muslin to  practice the techniques in the real thing. We made straps, gathered the  bottom part, made a lining. I put in the zipper.
Here she is in the practice version. She looks so lovely!


Then we moved onto the real dress. Nina chose her fabrics very carefully. Isn't it so cute on her? 
She LOVES the highlighter yellow fabric.  She told me if she could have a lot of clothes in that color, she would  be very happy. 
The rest of us  would all be blind. But she would be happy. 

She is showing off the ruffle!


Nina's Mom Doris, started taking lessons with me in the new year.  She did the gathering  where the skirt attaches to the bodice.  I was showing her how to help Nina and then  we just did it.  :)  So I think this is awesome- Mom and daughter both sewed the dress with me!

Back View 


Ruffles are the painful part of any garment for my Saturday Girls ( age 9-17) .  They want to add them onto every garment  because they are so cute but they whine like I am torturing them unmercifully when we are doing them.  I have come to realize, that it isn't that the ruffling is  hard or that they don't get it: they don't like them because  it takes a while. It is slow going.  All the pinning and thread pulling and pressing and sewing  very  very slowly  just makes them crazy.  They still choose to do them, as they are cute but I usually end up doing most of it. :)

On the bottom edge ruffle of Nina's dress , I only pinned and gathered  about a 1/4  of it.  She did all the sewing and pressing. And with almost no whining) :) :)  I was very proud of her!
Attaching the ruffle.
Look at that serious face.  She was all about that ruffle. 

I love the tickled-pink-with-herself smile. 
I bet you she doesn't take this dress off for at least a week!


My favorite part of teaching my little ones ( I am sorry Nina, I know you are thirteen and a teenager now but you are still one of my little ones)  is that look on their face when they finish up with an item and put it on. See that picture above?   That's what I'm talkin' about. 


Goodbye, Nina! 
I have enjoyed teaching you! 
Please send me pictures of what you sew without me!!!
I will miss you!


And the rest of my students, take note!!! You  are absolutely FORBIDDEN from moving away!
No more birdies flying away from the nest!