Showing posts with label Home Decor. Show all posts

Sunday, October 28, 2012

Doug & Diane's Dining & Sitting Room Valances

Hello!
     It has been a while since I posted.  I have been pretty busy with lessons, halloween preparation, a kitchen redo and just life in general. :)
    I have also been working on valances for  Doug & Diane.  This time I was working on their dining room and  joining sitting room.   I have now done  the windows in 5 rooms on their house :)  They are so fun and so sweet, I love going to visit them!
   For the SR and DR they wanted valances.  We chose  the Catherine valance from Pate Meadows Patterns.  I love the updated swag and jabots of this pattern.   It is classic and tailored but still has a modern quality to it.


      Diane wanted a fabric that  evoked Williamsburg.  Doug didn't want anything that be  considered country.    They both  wanted color POP!  We have used red in each room of the house and so I made sure the Fabrics that I looked at  had dominant reds in them .
           When I saw this fabric I knew it was the one.  I still had some other for them to choose from but this one is just perfect. I love the large bold flowers and the blue vines.

     For finishing  the edges, Doug didn't want anything with an tassels or funny business on it.  I did still  take a couple of trims to show them ,  even though I knew he wasn't going to go for it, because I had to try! I have seen versions of this valance that had a tassel trim on the bottom edge and they were gorgeous.   He picked a  beautiful  red twist cording  from the trims I had brought  to choose from.
    The contrast fabric on the inside of the jabots and the horns  is a smooth creamy satin. It matches the walls almost exactly  and peeks out  of the bottom folds of the jabots.

The valance is very straightforward to make.  After making a number of Pate Meadows designs, I have their method of construction down pat.  The sewing part of the valance did not take  too long, however the altering of the pattern and cutting it all out took fooooorrrreeevvveeeer.
    The swag valance pattern piece unaltered is about 40-42ish inches long.  The fabric repeat of the large flower was 36 inches. I had take the inches out of the pattern piece so that I could allot 1 yard for each swag. The altering took a while because I had to evenly distribute what I took out. That took all my brain cells!   I then had to alter the jabot and horn pattern  piece as well.
Then I had to cut them out. My husband called  when I had the scissors in hand about to make the first cut. I was so relieved for an excuse to stall in cutting!

     Once I cut the first swag,  I used it to cut the other pieces. that way they would all be the same.  Then I cut interlining pieces , lining pieces and contrast pieces. Yes, a lot of cutting! Then I stacked all the pieces up on one end of the dining table  and there they stayed as I worked on them for a month. I couldn't store them in the sewing room as I have had lessons out there and the spare room was full of kitchen cabinet doors  being re-stained.  My husband did eventually ask, hey are these ever going to be done and off the table? :) 

       This pattern is a yardage eater!!!  Each swag is a little over a yard and each jabot is a yard.  I had to cut out of the center of the fabric, making it impossible to salvage any  leftover fabric to use for anything else.  It hurt me  a little to throw the cuttings away. This fabric is gorgeous!


This is the dining room valance. It is 88 inches long, 
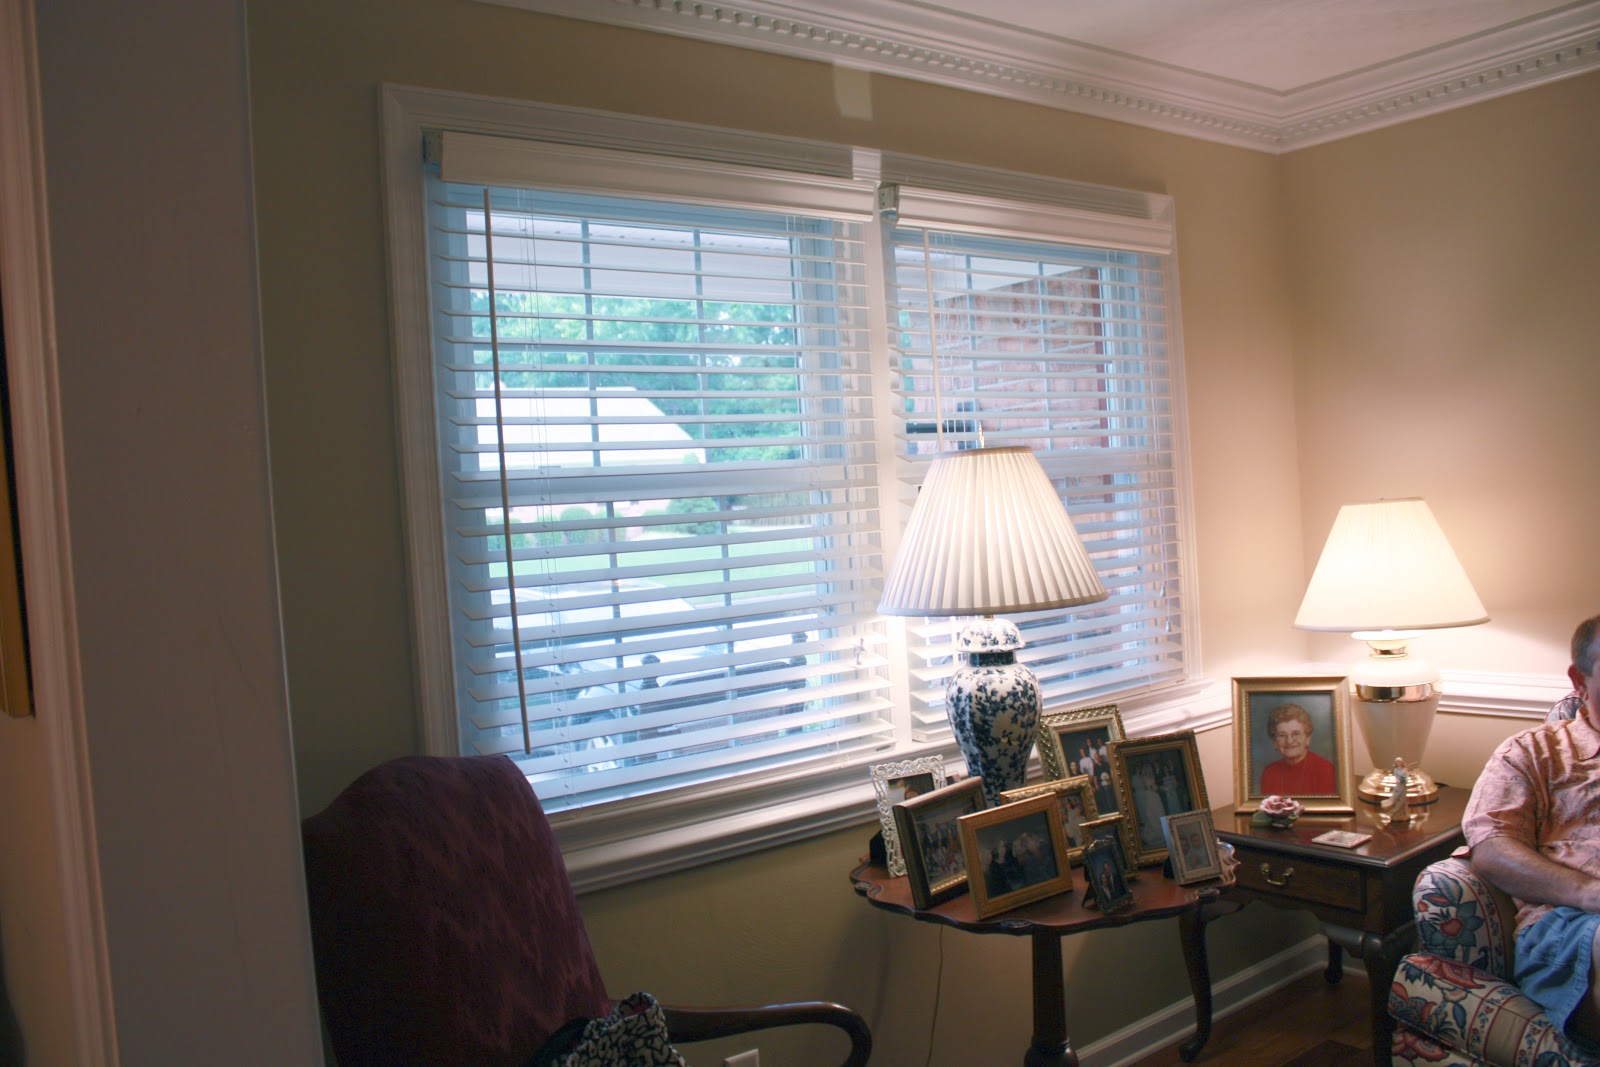
The dining room before .

       I love the red cording on the edges of the valance. It frames it gorgeously. I will confess, It is not one of my favorite things to sew. It is just thicker and therefore isn't super flexible or co-operative.   Most of the edges in this valance are pretty straight so it wasn't too bad.
I bought out most of the red twist cord in Hampton Roads because I needed large continuous pieces.  I had to go to a couple of stores and buy all they had. And then  wait till they got new  stock in to get more :).


 For the side jabots, the pattern has you make wooden pieces that attach onto the wall  under the rod bracket and then the  jabot return attaches to the wood.  I made the wood pieces but ended up not using them. 
I hooked a ring onto the bracket and attached the return of the jabot to that. I liked it better than  the wood. 


Dining room 
 The rods are solid wood and  lovely. I wanted to use wood rods as   Doug & Diane have lots of gorgeous wood pieces in these room.  The wood rod  ties it all together.
The sitting room  
The sitting room before. 

The Fabric:
The  red and blue is from Artee's in Virginia Beach. I used to love going there but they are under new management and I have to say, the guy running it now has kinda turned me off to the store.  I was confused by the lack of customer service and put off the the holier than thou  attitude of the manager. He was really rude to me directly  and I find that I do not want to repeat the experience. It is a shame, I used to really love going there.
The contrast cream satin  on the inside of the jabots and horns is from good ole Blaneys in Norfolk.  They have been there since the dawn of time and will probably be there till the end of time because hey have good customer service.  I have used this satin often as it is a dream to work with and comes in lots of yummy colors.
The linings are  flannel  interlining and roclon rain no stain ivory cotton.


The hardware:
is from Lowe's.  In the window treatment  hardware aisle, in the first section is a collection of Allan & Roth mix and match wood rods and finials. They are great quality and a  great price for decorator rods.

The pattern is:
Catherine valance from Pate Meadows Patterns.  All Pate meadows patterns are awesome.

Saturday, July 14, 2012

Does this count as insanity?

I started this blanket  in 2009. I saw this  crochet flower pattern online and loved it and I thought ( as I do with every pretty  thing I see online) - I can do that! I had never crocheted a blanket but it can't be hard, right? My Gram  used to  crochet amazing blankets.  She would just whip them right up. I have a lacy cream colored one she made that is just gorgeous. I pull it out once a year and put it on the bed for a while, admire it, then pack it back up. I  don't want to mess it up!   I decided to crochet a more practical blanket  in black and ivory, the colors in my bedroom.  This will take no time, I thought. Crocheting is fast.  I was going to do 144 squares- for a 12 square by 12 blanket.  Enough to cover a queen sized bed. 
 I did a couple of test squares and found the right gauge hook, super soft yarn and off I went. 

Note to self: when the first square takes forever, it isn't going to be a quick project. 

Each square takes about 2 hours. I can do about half a square a night, sometimes a whole one depending on what we are watching on netflix that night and how late we stay up.  Every few months, I pull out the crochet box and make square after square until I get sick of them and put them away for a few more months.  Then the crazy cycle starts over again. 

These photos date to November 2009.  I had done 18 squares  and was very proud of myself. I put them  on the bed to see how they looked and realized- oh holy cow and that which springs forth from the cows back end this is going to take me the rest of my life to finish.   I  decided to just make a throw. 8x8 squares. So now I just need 64. 
I love the contrast of the ivory yarn and the black. 

Eden assisted me with the square arranging. She was just 7 then. I love her missing front teeth.
 Only 46 squares to go Mommy!  Keep going!!!

Eden had me cover her up so she could test out the squares and see how comfy they were. 


It is 2012 now.. At the end of Mad Men last night, I counted  40 squares. 40.   In three years. 
 That means  40 squares at 2 hours a piece: 80 hours so far into this thing.
The yarn is Lion Brand Micro Spun I am not sure how many skeins of yarn I have used.  A lot. I think, and this is a guess, that I can get 2-3 squares out of a black skein and 3-4 squares out of  one skein of cream.  Joann's used to carry this yarn, but they stopped and so now I have to order it online. It is usually about $5 a skein but Hancocks has it every once in a while on half price and I try to order some then.


Here are all the squares I have completed so far :


     I ask myself every once in a while- why do I do these things? This is an insane amount of time to put into a blanket that, now that it is underway, isn't really as practical as my brain imagined it to be way back in the beginning. Now we have Sophie the wonder pup, her paws, claws, collar & tags  can catch in this one just as easily as my Gram's blanket so I can't actually put it on the bed and use it like a regular blanket. And my hubby has asked what is the point of a blanket with holes in it?  He doesn't really see it being used as how is it going to do  what a blanket is supposed to do which is  hold in heat, when there are holes in it?  I say it will work just fine  because it's pretty!  The pretty adds a whole level of funtionality. It will work even better than blankets with no design holes in them! 
    At this point, and even at the 18 square point, I felt I had too much time invested to give it up . What do you do with just 18 squares? Toss and time wasted?   So I wonder is that I am just too stubborn to give up, I am gonna see this though dammit and finish what I started  or am I just possesing amazing amounts of patience. Or is plain insanity an option here because who in their right mind really plans something like this?  64 freakin' squares.....
Whatever I am, stubborn, patient or insane I am going to be SO HAPPY when it is finished!!!!! And it will be  used more than once a year and displayed somehow in my bedroom either on the bed or on the chair or somewhere...Anywhere. 


Sunday, May 6, 2012

The Honkin' Huge White Panels of Death. Part 1.

 I am  still doing windows here in sewing land.  I know it looks like I have just been making clothing but  in the background there are windows going on. 
I showed you some cushions a few weeks ago that I did for Judy & Rob's NC cottage. I am now working on the windows. I will be making  pinch pleated panels, banded on the sides in blue denim. There will be buttons in denim up at the pleats. They are going to be AMAZING!
White duck , double width, pinch pleat panels. The very description makes me almost break out in hives.  There is a lot that goes into these.

The panels will look just like these that I made last year, but with blue denim on the sides & buttons. 


I thought I would take pictures while I was working on them to show you what goes into these monsters  beauties. 

First:
I ordered 41.5 yards of fabric. Why so many yards you ask? Well, I will be doing three  sliding glass doors in this fabric.  There will be a set for the great room, the guest room and the granddaughters room. each set takes 11/5 yards. Plus there are valances in the great room, and cording for cushions. 
The UPS man loves me. Have you ever lifted 41.5 yards of heavy fabric?    When I work with huge bolts I just flop them onto the floor and roll them around. He actually had to lift it from the truck to my porch. Poor guy. 

Next:
I clean the entire area  that I will be working in. I roll out fabric in the living room, so I vacuum that area super well. The I also clean up the dining room, scrub the table and vacuum. I usually do larger work on the dining table. It is cafe height, it is easier to work on than my sewing table. And so much easier on my back!
Now these panels are pure white.  So on the days where I am working on these, I cannot wear any make-up or hair products, so that it does not get anywhere on the fabric. I also cannot wear colored fingernail polish as  the fabric is thick and if I run my nails across it like to brush off threads , the polish  can leave a streak on the fabric.  I also wash my hands often so that any oils or anything do not transfer to the fabric. My hands & nails look horrible right now as this fabric is really drying on the skin. Plus the constant washing. 

 I roll out the fabric and check it for flaws. On printed fabric, this isn't as much of an issue. On pure white fabric, it is. They stick out and can ruin a perfectly made panel.  And let me tell ya, my panels are perfect. I guarantee that when I deliver these babies, they will be pristine. No a spot anywhere. 


Look here: this is a huge flaw. The red  is actually woven into the fabric, so this happened at manufacturing. Ugh. I can't cut it out, I have to try to go around it. So what I do when I find flaws is  put a big safety pin  on the flaw.  The pin helps me to spot it easily when working. Then as I cut it out or make it, I try to do it so the flaw is cut away or hidden somewhere.  I did add in a bit of extra fabric when we ordered to compensate for this. Fabric can arrive with flaws and the companies consider this ok. They tell you to to order more in case there are flaws.  On this bolt, I have only seen red and blue threads in it. The last time I ordered this fabric, I actually had to order more yardage because when I arrived there was a HUGE obvious flaw in the weaving that ran across the fabric and there was no way I could hide it in a hem or seam.


This is my assistant, Sophie. She was trying to convince me to play instead of work. Usually, I let her outside when  I vacuum and lay the fabric on the floor. Black dog and white fabric do not mix:) I let her back in when the fabric is up on the table.
Hey mom- don't you want to play?? I  have my santa squeaky!
 Put down all that white stuff and come play! Squeak Squeak! 

Here the lengths are being sewn together at the sides.  This fabric is 54 inches wide. I cut the length that I need twice and then sew it together. You end up with a huge wide panel.
I try to keep as much of the fabric up on the table as possible but it is heavy. So I sew  a foot or two and then stop re-arrange, move the fabric up on the table and then sew some more.
Once I have the face fabric done, I do the same to the lining, and interlining if there is some. We did not interline these panels as this set of glass doors has an overhang above it to help block some light. Also, this white duck is HEAVY!!! So I only interface this fabric if the window gets direct sun or if we are looking for extra  insulation on the window. Or if the fabric is thin. This fabric is thick.  Mr. Thick Thick Thickety Thickface Fabric  from Thicktown, Thickania. 

Once I have the face and linings cut, sewn, hemmed then I lay them out on the floor again and put them together . The lining is placed over the face fabric, wrong sides together. then I pull and smooth and tug again until they are perfectly lined up together. This can take a while.


The lining is placed two inches from the bottom of the face fabric. 
Then I pin the sides,  and sometimes I baste them in place. I basted these because they are so huge they move around a lot. Basting them helps me get less pins stuck in my hand. If I leave the pins in the sides, when I am working with fabric this large, it is so hard to watch out for them. 
I did get a pin stuck really deep in  my thumb.  I had to wait for the bleeding to stop  so I could go back to working. Blood and white fabric, don't mix. 


Then I measure, measure , measure and  measure once more and add in the buckram to the top and  fold it  over. I use the iron on buckram. I know there are purists out there that would never ever use iron on buckram, it is a modern invention of evil. But you know what? I like modern inventions of evil.  I have nothing against progress and I consider any iron on product progress.  You mean I can adhere it in a few minutes instead of wrangling with yards and yards of heavy white fabric at the machine?  And it looks the same as the sew in kind? Sweet! Sold!


I fold it  and mark the pleats. I use a piece of wood with the space and pleat marks drawn on it. This cuts  down on measuring time and makes it sooo much easier. 

Then I pleat the bitches sweet lovely cooperative panels.  I pin the pleats, then one by one sew them on place. 


 The next step is so band the sides.  Then add the buttons. 
Then I hang them for two weeks so I can train the pleats. And  check them over a million times . 

Then I do it all over again with the girls' room panels. Then I do it again with the guest room panels!
They are going to be awesomely gorgeous so all of the work that goes into them is well worth it. 


Wednesday, April 4, 2012

Blue and White

I finished up these cushions  this morning.  These are for Judy, a super good friend of my Mom-in-law. These cushions  will go in wicker chairs at Judy's beach cottage.   
I love the bright blue denim with the contrasting white trim.  The white duck cording makes a beautiful crisp  outline to the cushions.  Because they are made of a denim and cotton these cushion covers can be machine washed!    Practical as well as pretty!


These chairs are in  Rob & Judy's great room at the cottage.  Soon, I will be starting on  the drapery panels for the sliding doors  and valances  that will go in the room. The valances and panels will be the white duck edged in denim bands  or denim cording.  They are going to be gorgeous!

There are two seat cushions and two back square cushions.


I did a sort-of lapped zipper in the seam. The zipper is  hidden.  

Now that I have blogged about them, I guess I should go call Judy and  let her know they are done :)