Showing posts with label Eden. Show all posts

Tuesday, July 31, 2012

All American Girl


My Mom-in-law found the cutest 4th of July dresses  for the grandbabies summer picture.  Each year  on vacation we are taking pictures of the girls in matching outfits. She couldn't find a dress that matched in  Eden's size, so I made one!  ( Last year I made all three outfits, this year was much easier. Hooray! :) ) 
I took a picture of the baby's dress, then hunted down the right  fabrics. Sounds easy enough to find  navy & white stars and red & white stripes, right?  No, not really. They were a bit elusive  but I finally found the exact matches online. 

This is the baby's dress.

I used this pattern AGAIN. I know this pattern now inside & out, backwards and forwards. I have made 5 or 6 versions of this now. It is  so easy to alter and change up, each version looks different!  Eden loves each version , they have been her favorite for two years now.   When she grows out of this, we are going to have a crisis- what pattern will we go to for everything???


On July 4, Eden and I went to Michael's in search of ribbons  to put on the straps. They had nothing- we wanted stars and stripes and crazy  patriotic ribbons but it was all gone. They put it out so early and then it is all gone by the holiday.  I guess you have to get your July 4 stuff around Valentines Day. 
 (Halloween is out right now, people. It is July.  Halloween!)
We found navy ribbons and red ribbon  in the regular ribbon aisle and that had to do. 


The inside is lined in plain white cotton. I think it might even be white drapery lining...  Rock on Roclon Drapery Lining! I always have small cuttings of drapery lining hanging around. When  washed, drapery lining  does great as a clothing lining.  I didn't want to use the stripe to line it as I didn't want the stripe show thought the fabric on the outside.


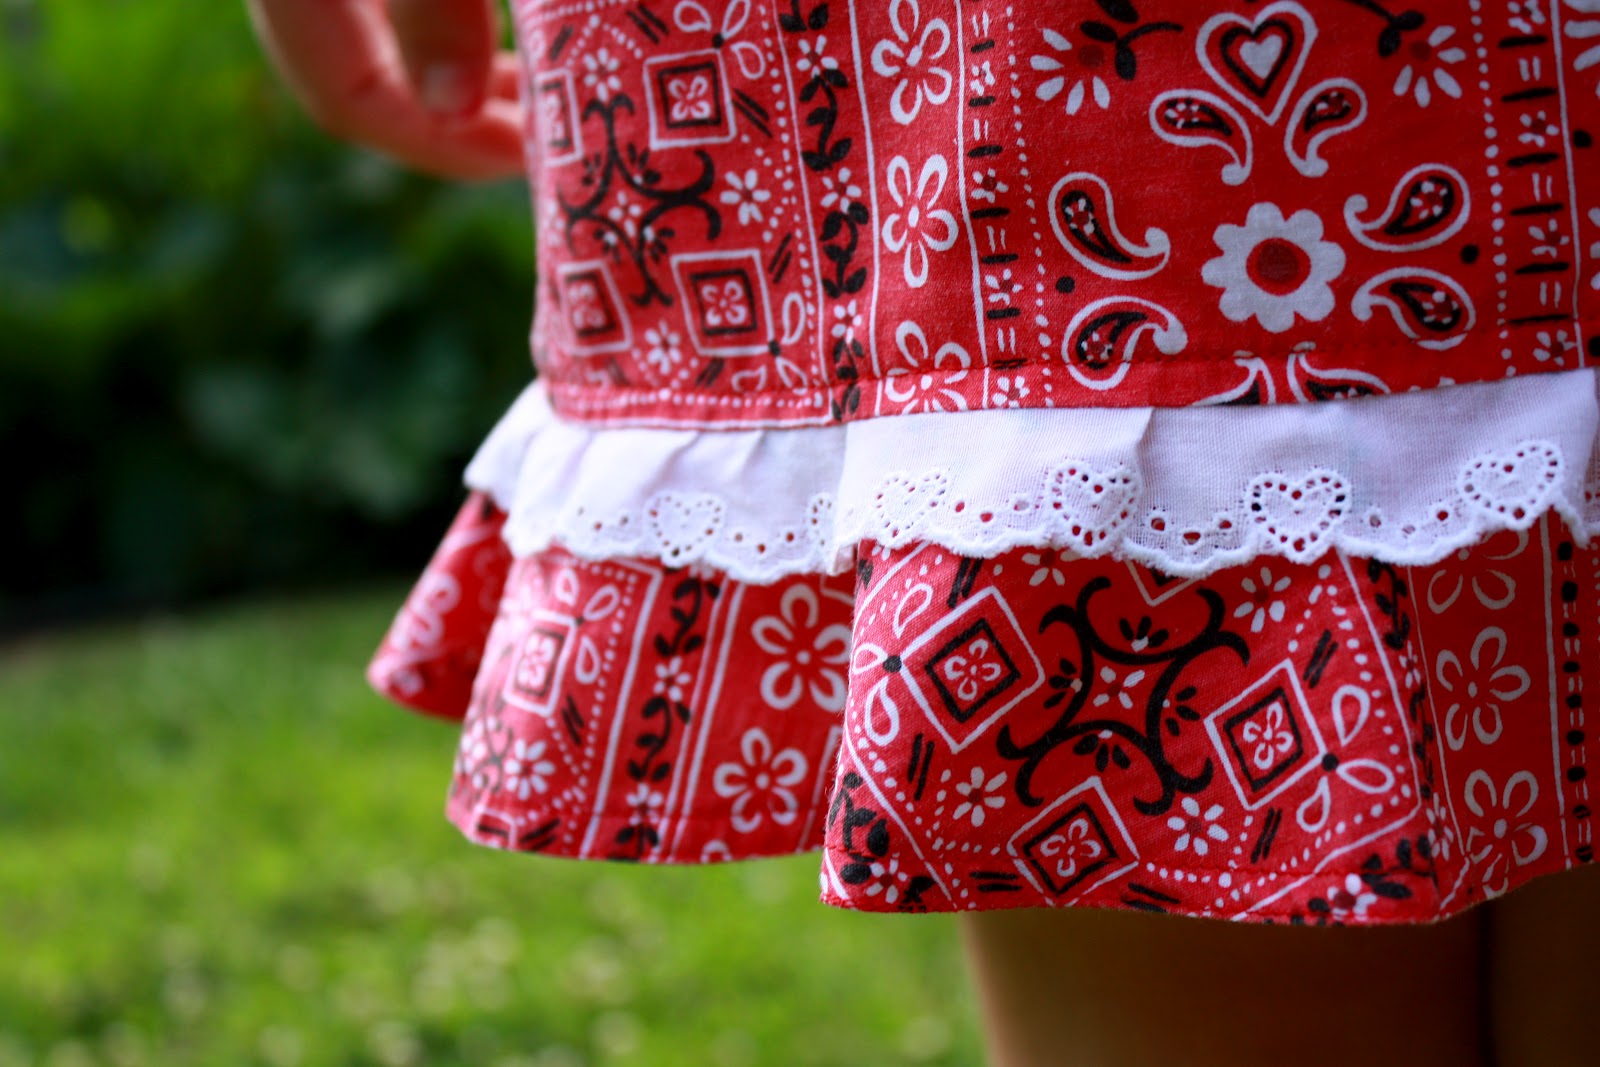
Lining up the stripes was fun. I pinned at each stripe and sewed sloooooooowly. The entire bodice is topstitched  at the top edge to give it more structure. 


The ruffle was attached to the dress on the outside.  There is  about 170 inches of ruffle on the bottom edge of this dress!!!   I thought it might be too much, as I was gathering it, but Eden loves it. It is her favorite part of the dress. 
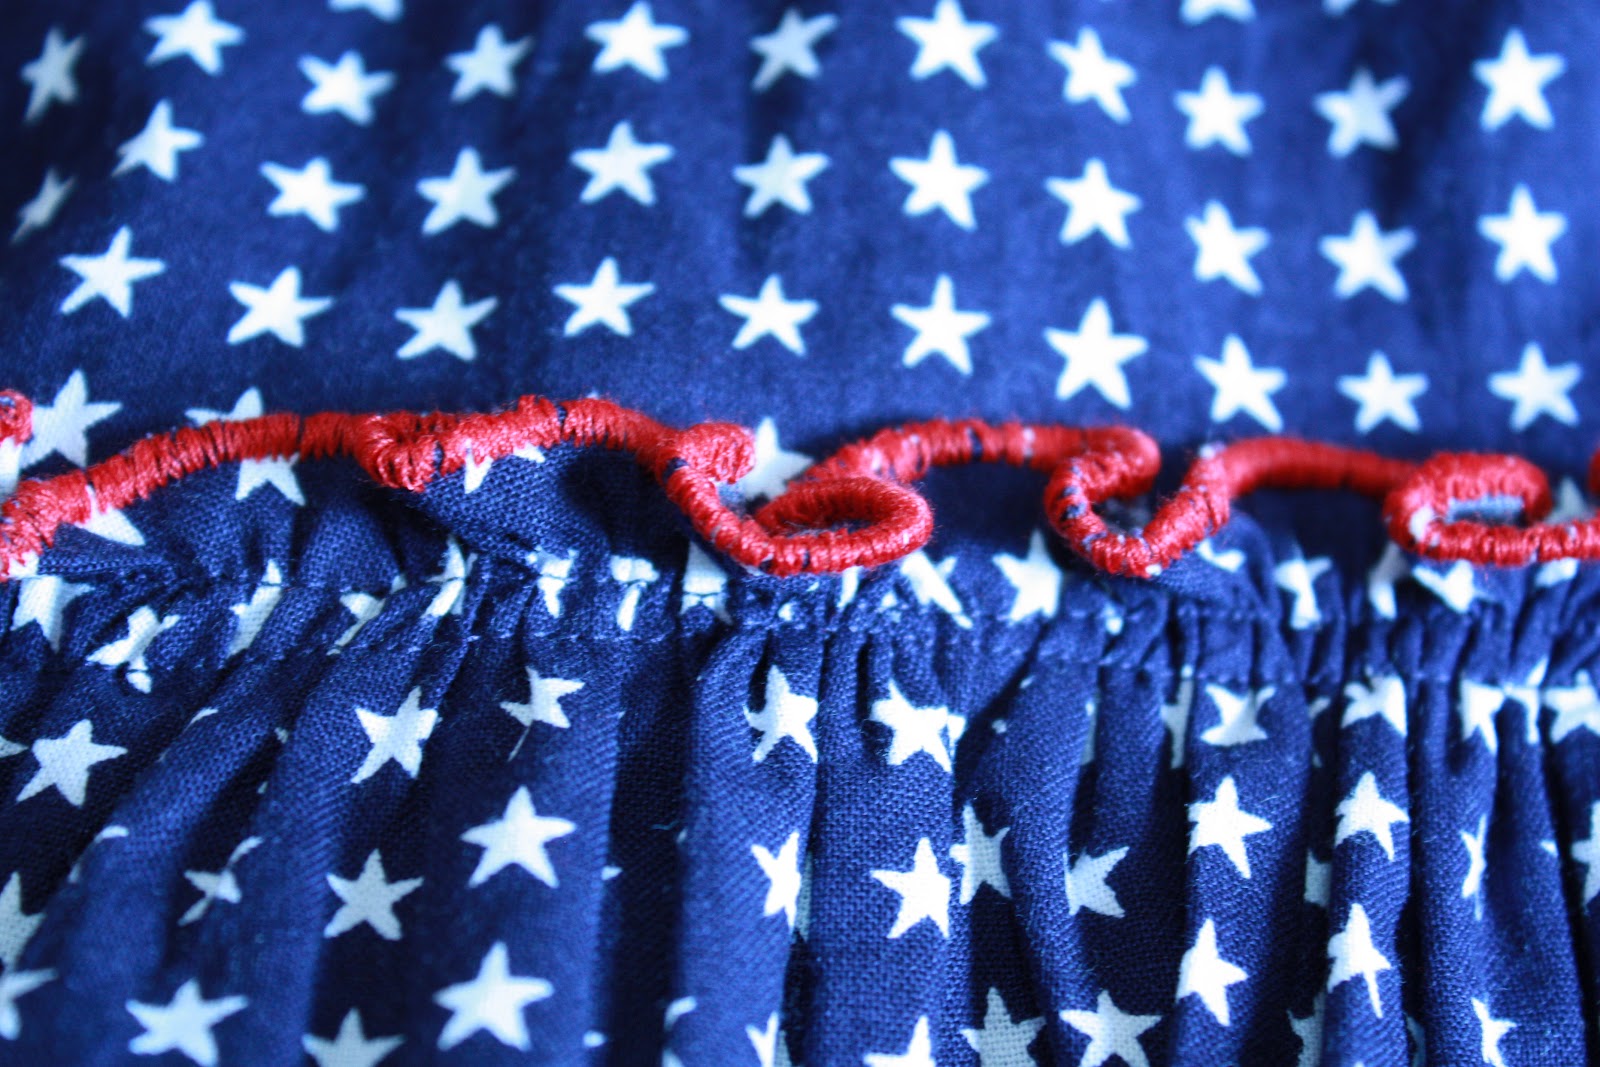
To look just like the babies dresses, I satin stitched the top edge of the ruffle in red thread. I used a short length zig zag and went over it like 8 times, around and around and around the ruffle loop. That took  forever- maybe an hour and a half. But it felt like forever, sitting there zig zagging and zig zagging and zig zagging.... 
I gathered it and attached it to the bottom of the dress skirt with two rows of stitching.  One row just didn't seem like it was going to hold up that insane amount of ruffle! 


 This is the underneath of the ruffle- I attached it to the skirt  and then just zig zagged the bottom edge of the skirt to keep it from unraveling. 
The bottom edge  of the ruffle is a rolled hem . I used the  1/4 inch size rolled hem foot.  

Here is Eden  on the deck in Nag's Head. 

My shy girl. 


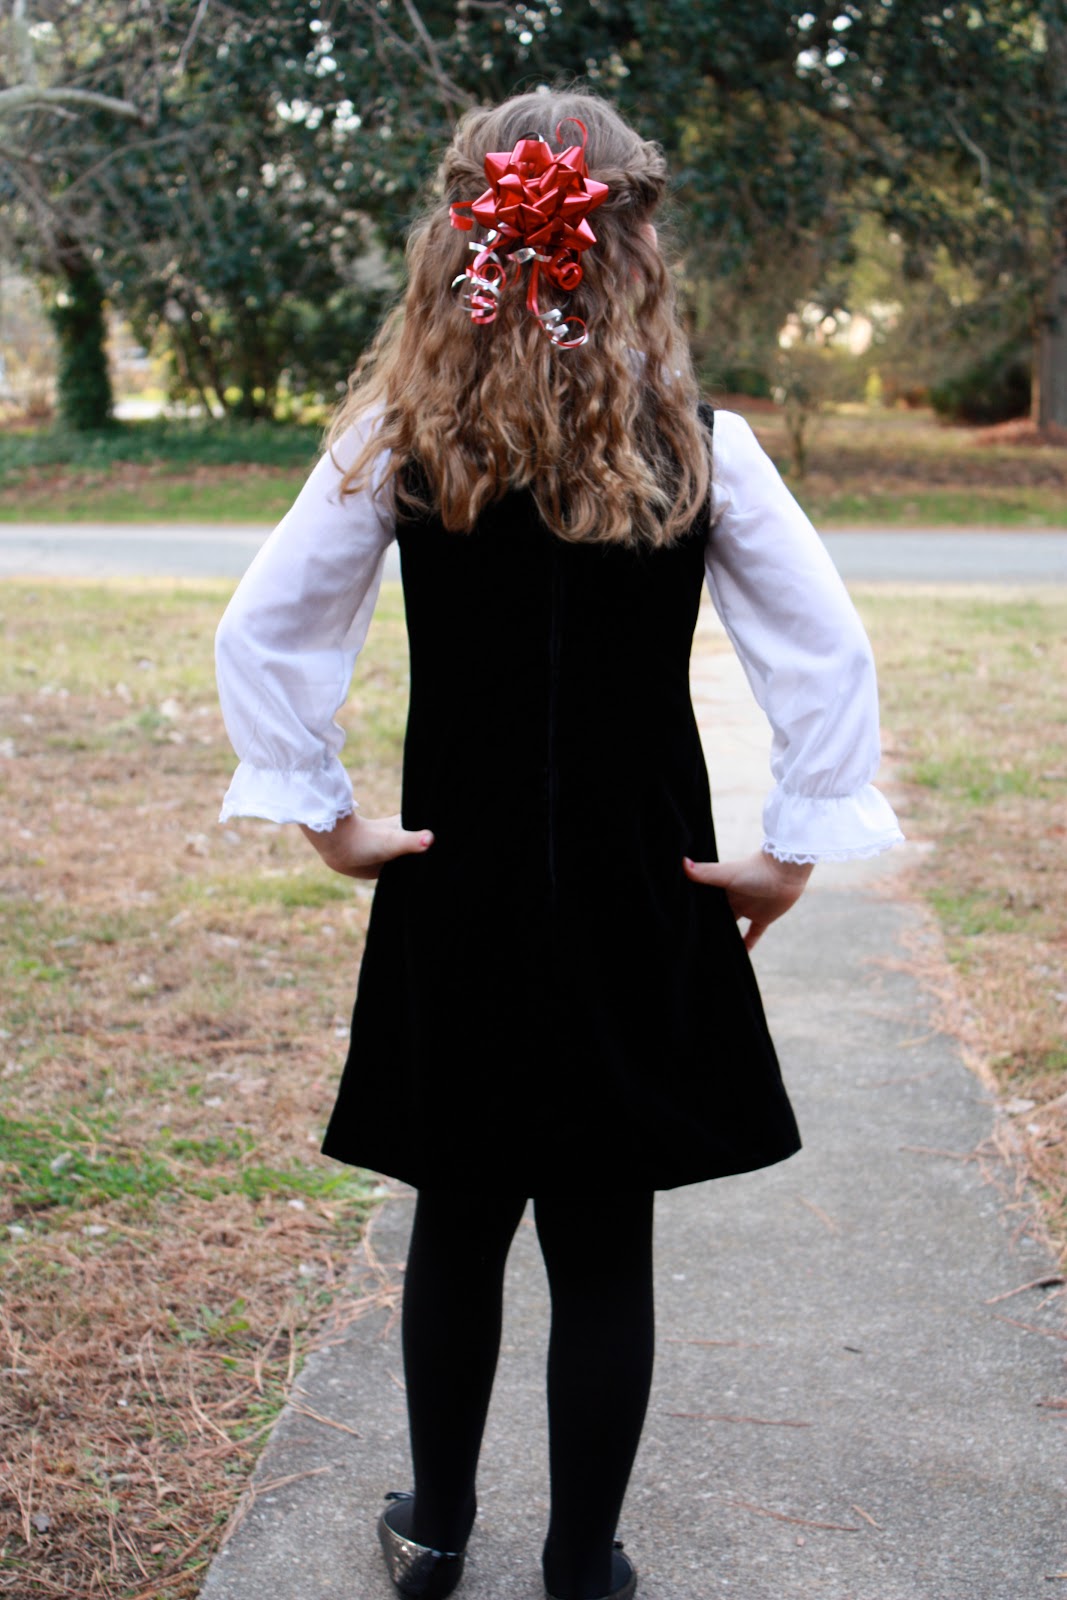
The back of the dress

On the straps, I used an heirloom stitch on my machine and a wing needle. I thought it kinda looks like fireworks !
The ribbons on the straps , meant to match the little ones dresses, actually cover up a booboo. I tried to get the straps sewn on so that the stripes  went in the right order, meaning the top row of the bodice is a white stripe so the first stripe showing on the straps should have been red. Uhm.....it didn't go quite like that. After re-doing it three times after it came out crooked or on the white stripe not the red,  I said  something like "to heck with this" only a little less PG . 
I put ribbons and a button over it and done! You can't tell underneath is all crazy crooked stripes of the wrong color. :) :) !!!!
I did make this dress about an inch  big around her chest. I would like for her to get to wear it next year too.  I ended up spending a good chunk of time on a dress she has worn....3 times. By making it just a tad big, she might be able to wear it three times next year!  


So, how did the picture of all the babies turn out, you ask?
Here is the best picture!
Molly is the little one being held up by Eden and Naney is standing next to Eden. Aren't they adorable?
The ribbons on E's dress didn't end up in the photo but other than that- how cute is this??


It is extremely difficult getting a good shot of multiple babies.  They just don't get the picture taking process. "You mean you want me to stand still and smile and look at the camera? Aunt Stacye, you're so  funny!" We just wanted one picture of them all together, looking in the same-ish direction.  The photo above is the winner: all the girls in one photo, looking sort of at me.  I also got some cute, cute shots of the  girls  in their dresses looking everywhere but at me, and running in every direction!

I  love this photo- Naney is trying to grab Molly's hand and
  Molly is just trying to get back to her mommy.
 Eden is trying her best to herd the sweet
 little baby sheep together so I can take the picture!


This is my favorite photo of my baby. 
My all american girl with a gorgeous summer smile!! 


Happy Summer! 


Monday, July 2, 2012

The Red Dress of Summer


Eden and I made a dress back in March for her to wear on spring break when we went to Tennessee. It has become her favorite dress!  I picked the fabric- I thought this bandana fabric was  just perfect for Tennessee. Eden chose the pattern. Shake it up is  one of her favorite Disney shows and she went nuts that there was a pattern. Went totally bonkers, actually. I told her I had seen it in the pattern book and she was so upset that I didn't buy it. So next time Simplicity was on sale, I got one for her.  

We made version C. We moved the elastic from where the pattern has it
 at natural waist, to an empire waist. 


Here is the whole dress. Eden is standing in front of our garden, in front
of the mutant zucchini and squash plants.  


Back view. That is my hubby in the background , weeding :) 

Eden cut out the pattern all by herself!!
Eden cut the pattern out, cut the fabric and did about 1/2 the sewing. I did the harder stuff (what she considers harder like the ruffle and the flounce and the top stitching) 


Sophia and I supervised Eden cutting out the pattern 


Bottom Hem .   Eden and I love the cute cotton lace with hearts. 


Eden wanted the cotton lace on the straps, too.  It makes a cute addition!
 This pattern had some  issues in the instructions. It  left out the last steps completely. I think someone at Simplicity saw popularity of the show and acted quick to get the pattern our while there is a demand- but they forgot to proofread it!   
We  plan on making more of these dresses. It is very quick to put together and  Eden loves how comfortable it is.  Since spring break Eden has worn this dress weekly. Now that it is hot as everything here ( 95 today - heat index over 100 ) she  loves it as it is light and cool. 

Eden is wearing her red dress in Tennessee on The Square in Lynchburg  . She is kissin' Belle. 


Eden and I are in Lynchburg Cemetary in the Bedford section.  'cause we're Bedfords.
I am wearing my Jasmine blouse.

@ mile post 6.5  On the way to Nags Head.  June 2012


I asked Eden if she had any messages to give ya'll. She said just to say that she loves her dress-
and  Peace!


Thursday, May 10, 2012

I can make anything- even beards!

Last week Eden had a school project  about famous explorers She had to pick one and write a  report, make a poster, and dress up like the explorer.
Eden chose Jacques Cartier.  She came home from school all raring to go  to get her costume together. She said some of the kids were complaining about having to come up with a costume but she was excited. She has realized that her mother is storing a lifetime of costumes and dresses and vintage who-knows-whats  in the closets and attic of this house. I did not have a beard however. My  collection is   lacking in the faux facial hair  area so I googled how to make one. 
How did we ever live without google? 


The beard is felt with ribbons sewn into the sides to tie around her head. It is the easiest thing to make in the entire world and so fast! It took 15 minutes! Just two pieces of felt, some ribbon. That's it.   I got the pattern and instructions here:
It is comfortable to wear and she loved it. 
The wig is mine, yes I used to wear it  :) ,  the cape is a 1970s faux fur  cape that I used to wear all the time. The shirt is the white shirt from her christmas  outfit,  and the fox is  to represent the fur trade. French explorer dude came to the new world looking for gold and fur.  The boots are her favorite Justice boots. 
We had planned the costume with a hat but at the last minute we left it off- she left it because it was hard for her to get the wig on  on her own much less get the hat to stay and I chickened out on sending my 1960's velvet and satin perfect condition Jackie O type  pillbox hat to school with a third grader.
 I just couldn't do it. 

Here is the man himself:


And here is his  likeness as done by a third grader.
 
This is her I am a serious explorer face. 

I can't really tell them apart! Can you?  :)  

Friday, December 30, 2011

The Christmas Dress


A few months ago  I saw this dress  pattern on etsy  and  I  had to have it.  Luckily, I have a size 8 child to fit it!  I probably would have bought it even if I didn't have a size 8 child because it is just so sweet!  I love 60's patterns.  I love the black dress & white shirt version. How classic!  I wanted to make her one exactly like it. 


I searched and searched around town for a lightweight white cotton for the shirt. I knew what I wanted but could not find it anywhere.  I finally found it at Joann's.  It is so lightweight it is almost see through. Eden had a HUGE problem with the idea that it was see through but once I got it through to her that the velvet would cover everything up, she relaxed :). 
The velvet I found at Joann's too, after I had ordered some velvet from Fabric.com.  The velvet that came from Fabric.com was not what I had in mind. It was very thin. It was described as thick but what showed up wasn't.  I  stopped into in Joann's for some  cording for Stephanie's kitchen valances that I thought I had bought already and couldn't find and HOORAY! they had  a brand new bolt of nice thick black velvet . 


Here she is before school on the day of her class christmas party.  

The dress is lined in cheery red lining. The pattern did not call for the dress to be lined but I really  feel that lining clothing makes them sooo much more comfy to wear. 


I used a book on linings for assistance on creating a lining - The Easy Guide to Sewing Linings  by Connie Long.    I used info in the chapter on dress linings, sewing the un-interfaced lining directly onto the lining, then attaching that to the dress.                            Here is  a photo of the book. ( I have been sitting here forever trying to turn the photo into a link with no luck- :(  I'm being outsmarted by blogger.  ) 


 This pattern  itself could not be more beautifully simple.  There are four pieces - front, back, neck and arm facings, that's it!  And small too, as it is for a 9 year old.  However, sewing the velvet could have been more fun.  It slid around like crazy! I had to pin and pin and pin.   Also, I  could not press the seams down as the velvet would crush and look shiny on spots.  I ended up top stitching around the neck and arms to get them to stay down as without pressing them, they just wouldn't lay right. 


The hem is done with lace hem tape attached  by zig zag and then hand sewn up. 


Here is E in the dress sitting on Santa's lap with her cousin Molly. 


The shirt was pretty easy to make too. I think it took a total of three hours to complete.  I used french seams at the shoulders and all other seams are clipped very close and zig zagged. 
The neckline has  bias tape over the raw edges of the seams instead of a facing. This worked very well for such a sheer material. 
The collar and cuffs is edged  in a tiny  lace.  I had a terrible terrible moment with this lace!!  I was giving the shirt a last press with a super hot iron and the iron slid off the press cloth and went over the lace- which I did not realize is polyester and IT MELTED!! Into a glob of ick on the edge of the collar!
 (Luckily, I was raised by a sailor and so I have the proper vocabulary for these moments. I said every word I knew and then I made up some!)
After I calmed down, I looked at the collar and realized there was no way I could take apart the collar section  of the shirt to remove that section of lace.  I had inserted the lace back at step one when I sewed the collar together.  I ended up clipping the melted plastic off and hand sewing in a small section of lace to the edge of underneath on that section of collar. - when she is wearing it, you cannot tell at all where I fixed it. 


 This picture Eden is wearing the 'muslin'  aka the practice version of the shirt. Sometimes I don't make a muslin out of muslin fabric- if I am going to be spending a lot of time on it, I might as well make it out of a fabric that she can wear.  This farbic was $1 a yard so if I blew it out of the water, there was no loss.  When  I made the muslin,  we found the shirt was very short, so I added a ruffle onto the bottom to lengthen it. When I made the white cotton version, I just added about 4 inches onto the bottom of the pattern  when cutting out.

I made a muslin for the dress as well out of actual muslin and found we only needed to take in an inch on the front and back.
 Eden is sitting on her Grampa's lap,
who is also wearing his Father Christmas coat that I made.
 Pretty cool, eh?


E learning the trick to multiplying nines from Aunt Stef. 

The pattern was pristine and  untouched when I received it in the mail. I felt a little guilty cutting into a perfect untouched 1960's pattern  for notches and  using the dressmakers tracing wheel on the darts. But I really didn't want to take the time to trace it.  The pattern is still totally usable and anyhoo-  the pattern is mine now forever, mwahaha.:) :)  I will just pass it down to E to make a dress for her baby  when she is  older ! :) :)