Friday, December 30, 2011

The Christmas Dress


A few months ago  I saw this dress  pattern on etsy  and  I  had to have it.  Luckily, I have a size 8 child to fit it!  I probably would have bought it even if I didn't have a size 8 child because it is just so sweet!  I love 60's patterns.  I love the black dress & white shirt version. How classic!  I wanted to make her one exactly like it. 


I searched and searched around town for a lightweight white cotton for the shirt. I knew what I wanted but could not find it anywhere.  I finally found it at Joann's.  It is so lightweight it is almost see through. Eden had a HUGE problem with the idea that it was see through but once I got it through to her that the velvet would cover everything up, she relaxed :). 
The velvet I found at Joann's too, after I had ordered some velvet from Fabric.com.  The velvet that came from Fabric.com was not what I had in mind. It was very thin. It was described as thick but what showed up wasn't.  I  stopped into in Joann's for some  cording for Stephanie's kitchen valances that I thought I had bought already and couldn't find and HOORAY! they had  a brand new bolt of nice thick black velvet . 


Here she is before school on the day of her class christmas party.  

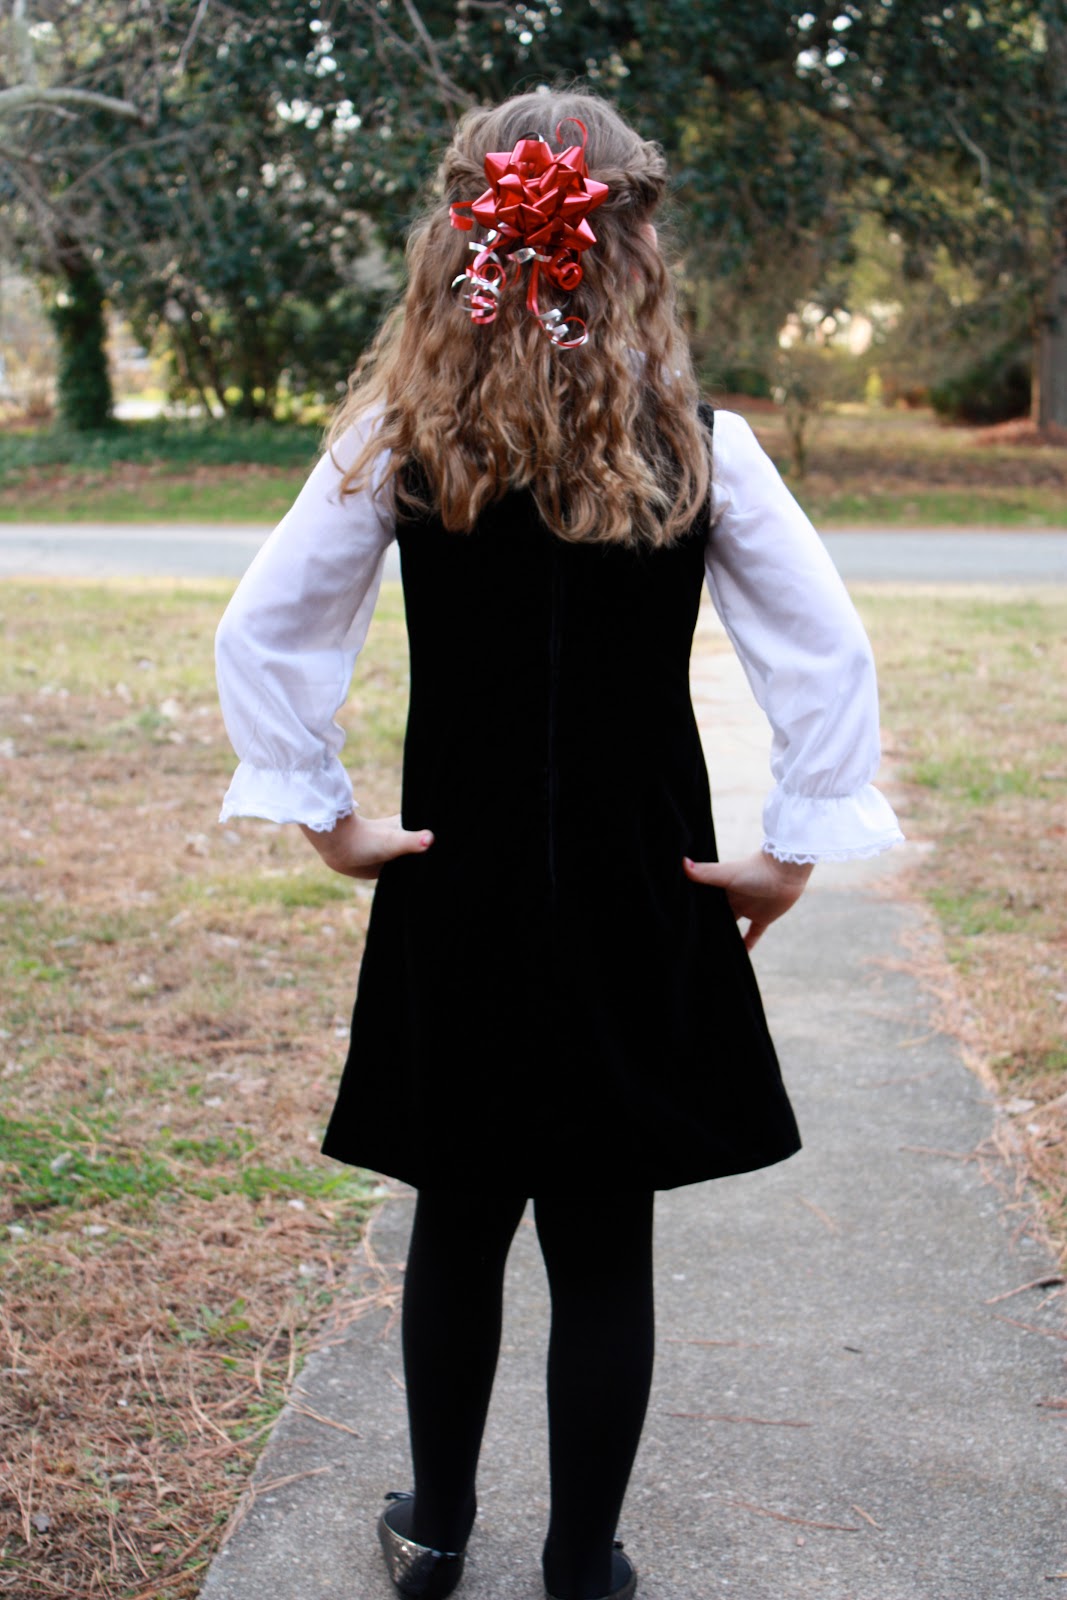
The dress is lined in cheery red lining. The pattern did not call for the dress to be lined but I really  feel that lining clothing makes them sooo much more comfy to wear. 


I used a book on linings for assistance on creating a lining - The Easy Guide to Sewing Linings  by Connie Long.    I used info in the chapter on dress linings, sewing the un-interfaced lining directly onto the lining, then attaching that to the dress.                            Here is  a photo of the book. ( I have been sitting here forever trying to turn the photo into a link with no luck- :(  I'm being outsmarted by blogger.  ) 


 This pattern  itself could not be more beautifully simple.  There are four pieces - front, back, neck and arm facings, that's it!  And small too, as it is for a 9 year old.  However, sewing the velvet could have been more fun.  It slid around like crazy! I had to pin and pin and pin.   Also, I  could not press the seams down as the velvet would crush and look shiny on spots.  I ended up top stitching around the neck and arms to get them to stay down as without pressing them, they just wouldn't lay right. 


The hem is done with lace hem tape attached  by zig zag and then hand sewn up. 


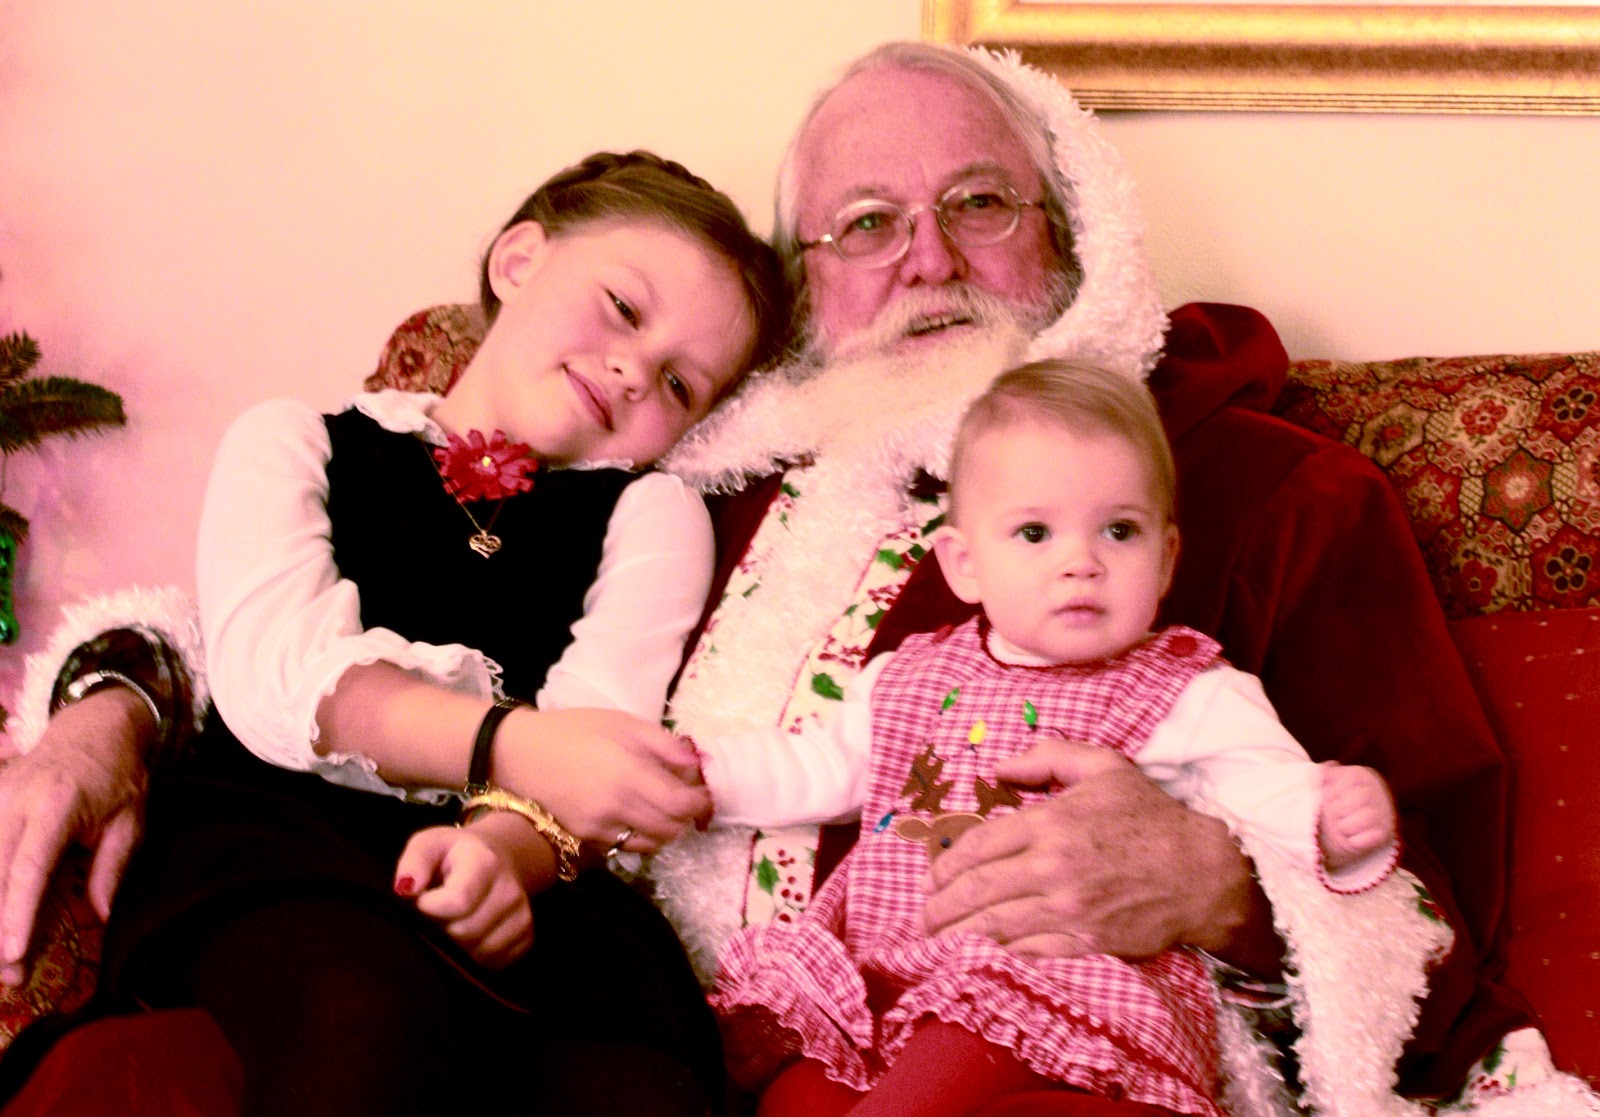
Here is E in the dress sitting on Santa's lap with her cousin Molly. 


The shirt was pretty easy to make too. I think it took a total of three hours to complete.  I used french seams at the shoulders and all other seams are clipped very close and zig zagged. 
The neckline has  bias tape over the raw edges of the seams instead of a facing. This worked very well for such a sheer material. 
The collar and cuffs is edged  in a tiny  lace.  I had a terrible terrible moment with this lace!!  I was giving the shirt a last press with a super hot iron and the iron slid off the press cloth and went over the lace- which I did not realize is polyester and IT MELTED!! Into a glob of ick on the edge of the collar!
 (Luckily, I was raised by a sailor and so I have the proper vocabulary for these moments. I said every word I knew and then I made up some!)
After I calmed down, I looked at the collar and realized there was no way I could take apart the collar section  of the shirt to remove that section of lace.  I had inserted the lace back at step one when I sewed the collar together.  I ended up clipping the melted plastic off and hand sewing in a small section of lace to the edge of underneath on that section of collar. - when she is wearing it, you cannot tell at all where I fixed it. 


 This picture Eden is wearing the 'muslin'  aka the practice version of the shirt. Sometimes I don't make a muslin out of muslin fabric- if I am going to be spending a lot of time on it, I might as well make it out of a fabric that she can wear.  This farbic was $1 a yard so if I blew it out of the water, there was no loss.  When  I made the muslin,  we found the shirt was very short, so I added a ruffle onto the bottom to lengthen it. When I made the white cotton version, I just added about 4 inches onto the bottom of the pattern  when cutting out.

I made a muslin for the dress as well out of actual muslin and found we only needed to take in an inch on the front and back.
 Eden is sitting on her Grampa's lap,
who is also wearing his Father Christmas coat that I made.
 Pretty cool, eh?


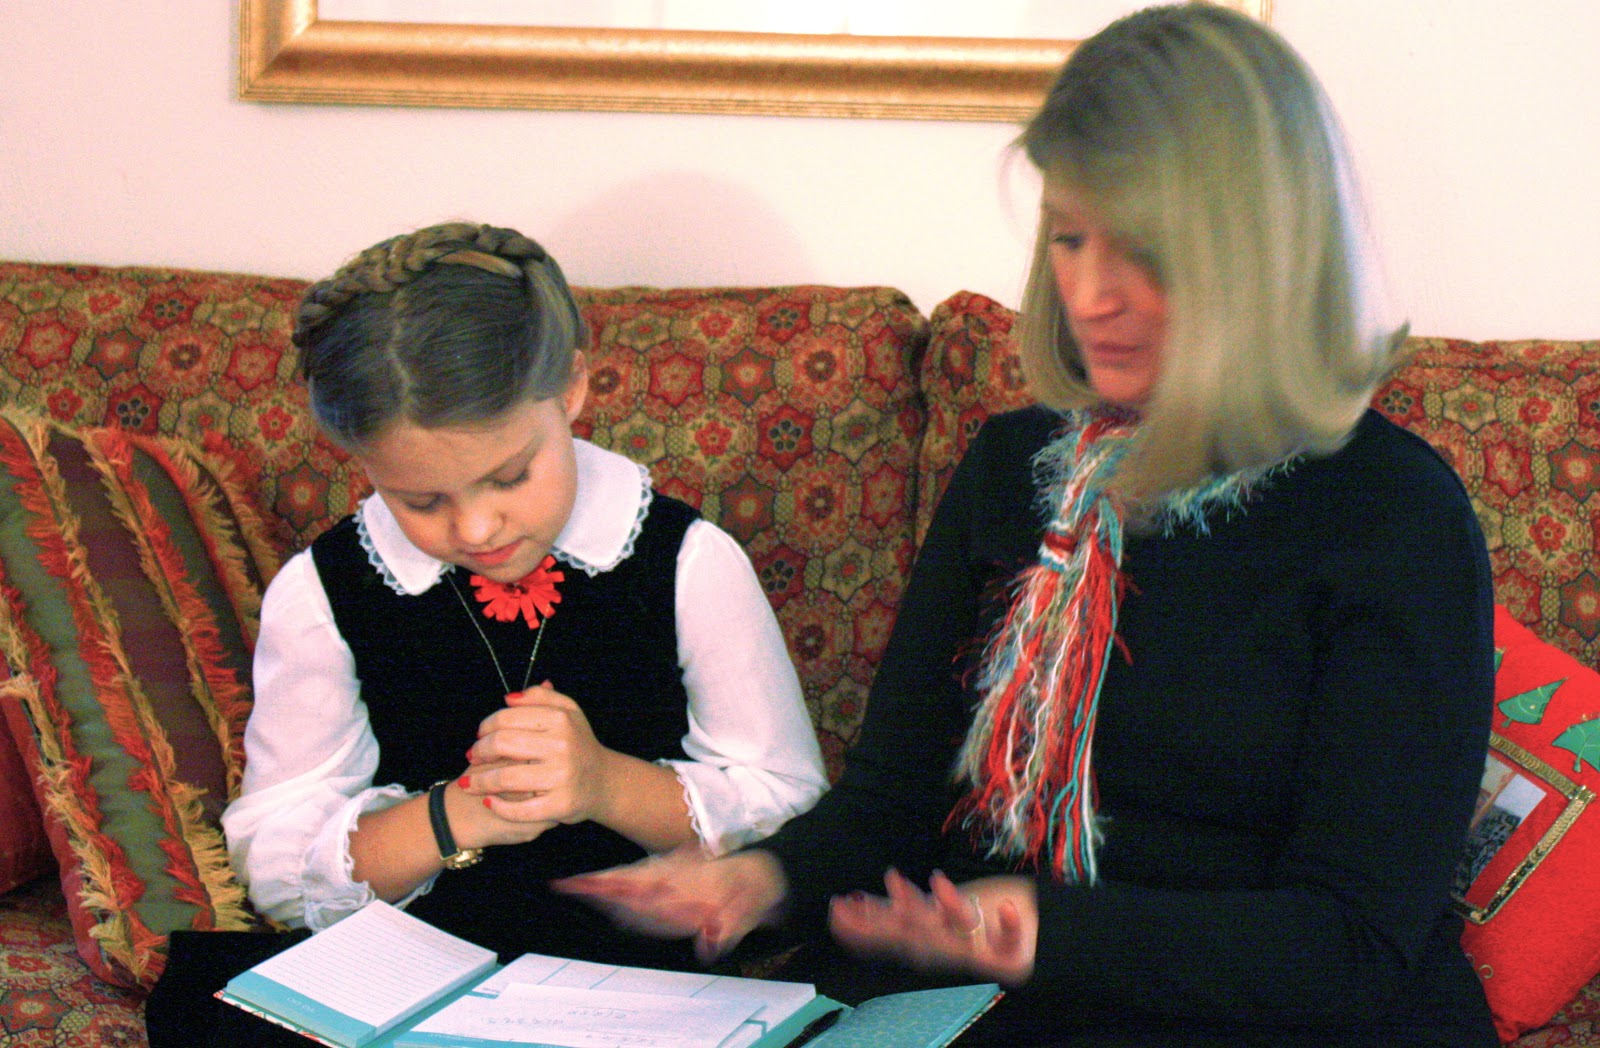
E learning the trick to multiplying nines from Aunt Stef. 

The pattern was pristine and  untouched when I received it in the mail. I felt a little guilty cutting into a perfect untouched 1960's pattern  for notches and  using the dressmakers tracing wheel on the darts. But I really didn't want to take the time to trace it.  The pattern is still totally usable and anyhoo-  the pattern is mine now forever, mwahaha.:) :)  I will just pass it down to E to make a dress for her baby  when she is  older ! :) :)


Friday, December 2, 2011

Father Christmas has come to town

It's December! How on earth did this happen??  I swear it was October just 2 minutes ago...


 A couple of  weeks ago I finally finished up a  Father Christmas coat for my dad.  He dresses as Santa each year and wanted a bit of a change.  He asked for a long coat in a different red than his regular Santa suit.
Here he is  in the coat with Honey, Lynchburg TN's prettiest blond girl.   Check out her hooves! What a lady :)
Honey is  the sweetest horse ever!  

It is this pattern, lower right view, with a few decorative changes. McCalls 5550


I tissue fitted him this summer so I could get a general idea of how it was going to fit him- was it going to be long enough to cover the tops of his boots?   How long were the sleeves on him?
I took measurements of him to use but tissue fitting  worked better for me. This is my dad, covered in pattern paper :)


I have never made a father Christmas coat before.  I also do not generally make things for men so I covered all the fitting bases by tissue fitting, measuring and making a muslin.


We tissue fitted this summer .
I made a muslin of the coat out of drapery lining and sent it to him in TN.
He then took it to a friend down the road a ways and she marked up the muslin to fit, added markings where he wanted pockets,  and then he sent it back.
Last, I made the coat and sent it back!


  • I added a lining as the velveteen is HEAVY and it would be very hard to pull that heavy coat on without lining.  The lining , I think,  makes the coat comfortable . As Dad does parades and outdoor festivals, he might be wearing a coat or at least long sleeves under the coat. The lining enables that he will be able to move .
  • The faux fur  on the sleeve ends is  on the inside of the coat as well. Dad does parades and there is waving going on. I needed to be sure that the coat sleeves were  waving friendly: meaning you couldn't see any construction on the inside.  It was pretty tricky to figure out how I was going to do that and not have all of the stitching show. I had to sit down and use all of my brain cells.  I ended up sewing both fur pieces  in the seam and then stitching the inside faux fur and then the outside- that hid all of the construction.
  • I added a hood. When looking up father Christmas images, about half had a hood. I think it looks more traditional with the hood. I am still making  two hats for dad to go with the suit, one with the holly ribbon and one without so he can wear it with the suit. The hood is a bit big and it doesn't stay up too well. Those hats should happen this week. 
  • I added a wide ribbon around the edges of the fur. I thought the coat needed an extra somethin' somethin'.  It adds in an extra bit of color. I searched  everywhere for the right ribbon.  I thought I wanted something with a gold in it, but when I found this ribbon , I knew this one was perfect. It has a very painterly holly image on it that fits with the father Christmas theme better than gold would. 
  • Dad requested pockets   and those are built into the coat on the side seams.  I also made a belt. 
  • We will be adding red velvet buttons down the center fur when he brings it  to VA at Christmas.  They will be decorative, not functioning. The coat closes with big Velcro pieces inside  as button holes in that faux fur would be impossible. 


Cutting the faux fur was an adventure. I had learned from making Eden's Scooby Doo costume a couple of years ago that the faux fur gets everywhere.
I cut the fabric  up in the living room instead of my sewing room because I could easier cut and vacuum  after. I would cut the faux fur piece with the rotary cutter, shake it out on the carpet, vacuum the carpet and pieces  and table - then immediately sew it on.  Even doing that , our living room had a film of shiny white dust for a week or so.
I covered our bookcases with big sheets to I didn't have to dust them after. Faux fur when cut gets EVERYWHERE. It flies through the air and gets in your nose and is generally a pain. Once it gets sewn  onto the clothing , and the ends are tucked in, it won't do it anymore.  I used a great faux fur that looks like poodle fur up close.


Before I sent it   to Dad my family  took "Fun with the  Father Christmas coat" pictures in the dining room. (It was empty because we were redoing the floors. :) Which are done now and look so good! )

First up was my sweet hubby.

Father Christmas boxing.
I think this look suits him.  :) :) 


Eden is her  Disney wicky wicky fresh word move. 
(If you have to ask what the  wicky wicky fresh word move is then  you have not been subjected to untold numbers of Hannah Montana episodes and should consider yourself lucky. If you did not have to ask  and knew right away what I was talking about, I am so sorry.  )

All hail the 8 year old!


All hail me!


I am a kung fu bunny in a father Christmas coat. 
Sing it with me...."Every bunny was kung fu fighting."


 Father Christmas and Honey the Belgian Reindeer. 


Wicky wicky fresh. Word. 

Wednesday, October 19, 2011

Ketchup?

I covered Judy's  kitchen chairs this week.  Aren't they pretty? 

This is a photo of what they looked like before. They had a pretty solid ivory fabric on them.   And then the grandbabies arrived and her lovely ivory chair covers were no more :) 


This is Sissy, Rob & Judy's sweet lab.  She is an old dollbaby.  Look at that face. :) She watched me  measure and take pictures for a few minutes and then went back to sleep. 


I found the fabric at Blaney's in Norfolk. It had all the colors we needed plus the flowers blend right in with the rest of Judy's home.  And a great price- it was $10.98 a yard. I used 4 yards for 8 chairs. 


I took the chair pads home a week ago and then brought them back to re-attach. This is so much easier than taking the whole chair.  I had them done on Friday but they were out of town, so I took them to her on the following Tuesday.  I try to do chair cover jobs in one week or less  so that they client isn't without seats for too long.


So. Everything is lovely and we are attaching the seats to the chairs,  the sun is shining- the weather is sweet.  I picked up a chair pad and felt something sticky on the edge. I turn it over and there is a blob of something thick, bright red and very sticky. On the edge of her supposed to be pristine new chair pad!!! @#$$%  Where did it come from? @#$$%^ How did  what looked like partially dried ketchup get there? @#$%^ 
The good thing is that I had saturated the chairs after I recovered them with fabric protector. If we know the grandbabies are going to be sitting there, lets be ready for them :)  I got the spray fabric protector from Hancock's. It works great. I fully saturated those chairs. 
Judy grabbed a washcloth and it came right off, but I was mortified- how and where did this get on the side of the seat???
Where did it come from?? Is it  ketchup? What is it?
@#$%!! 
 I do have a kid and a dog and a hubby. And me.  So I went over every place and time those chairs where in my house. The seats were here for 7 days.  I  did these covers  on the dining table, which was covered with oilcloth. The pads where stacked in the far  corner of the LR on a chair that we don't use.   I went back over our menu here in the house and we never used ketchup or any red sauce in the dining room or in the LR. We never eat in the LR ( and in the past two weeks not in the  DR  because I have been swamped with work and took over the DR table as work table #2. My other table is in the sewing room and needs to be clear every day or so for lessons. )   
I went and searched my car back seat.  We don't eat in my car either so I know there has never been ketchup in the car. Or red sauce. Or anything. But I still checked. The only thing we really eat in my car are  Sonic fruit slushies  and Eden likes the lemon so I know it wasn't that. And tic tacs. But mint tictacs don't leave large red blobs of gook . 
So where  did it come from?  I don't know. I have gone over every place those chair seats were and can find nothing. I have no idea.  Could it have come from Judy's house? I set the pads down on one of  her large LR chairs. I also checked that while I was there, but really quick, not a thorough look over that I did at my house. 
I don't know. I am stumped. 
The chairs are pretty though. 
And we now know that they do not stain easily- the fabric protector really works. 


Saturday, October 15, 2011

Embroidered Summer

This summer I introduced embroidery to my younger students, the 8-12 year olds.    
In past lessons, a couple of them had mentioned that they didn't like hand sewing. Can you believe it? They said that- to me? So after I heard that, guess what I planned? A summer of hand sewing!  I thought summer would be a good time to do this as they would have some extra time around the house and be able to to it at home- not just in lesson. I use embroidery to teach hand sewing skills because it really encompasses it all: threading a needle, tying knots in the end of the thread, sewing and keeping the thread in the needle, making the needle go in and come up where you want,  tying off at the end, etc.  Plus is is fun to sew pictures in thread on stuff. 
I set each girl up with a hoop. fabric, embroidery needle & thread.  I used a dressmakers tracing wheel and pattern tracing paper to transfer straight lines on to practice fabric. Then we learned the running stitch, back stitch, stem stitch and chain stitch. 
We started out on muslin for practicing. We ended the project with embroidering on a t shirt that they could wear to school. Kayla even did one more project and made a bib for her soon to be born cousin! 

Here are some of the girls learning how and also some finished projects!


Madi and Eden
Eden is teaching her friend Madison how to embroider. 

Nina
 Nina loves dogs. So far every project she has made skirt- purse, pj pants has been out of a fabric that features dogs. So I was not surprised when she chose to embroider two scottie dogs on a shirt.   She is intending for them to look" kinda alien" so she has planned for them to be  green and purple and weird colors.
Nina is using a stem stitch to outline her scotties


Izzy
Izzy is working on the chain stitch.
Izzy is 8. This is Izzy's sewing folder. When each girl starts with me, they have a folder to keep handouts and patterns and the other paper things they need to bring back and forth. Izzy drew a picture of me on the back of hers- aren't I gorgeous!!!
Isn't this just the cutest thing ever? 


Kayla made a bib for her son to be cousin. He is a boy and so she designed a bib with an outer space theme.
Kayla really took to the embroidery. She was the main one saying she didn't like hand sewing. She admitted to me this morning, it isn't so bad. :) She is even planning to incorporate embroidery into her christmas presents!


The pattern piece for this bib is a dinner plate! Trace a dinner plate onto your fabric- then use a saucer to draw in the neck area. Cut this out and you have a bib! Bias tape edges make this a really quick , easy to sew up gift. 
We used some iron on transfers from Sublime Stitching for our images. 

This alien is absolutely adorable. Look at her perfect stitches! This could not possibly be any cuter!


We had a hurricane here in August.  We lost power in the morning on the first day and were without it for 6 days. Eden and I sat in front of the window and embroidered. A lot. There really wasn't much else to do!  She worked on a pair of birds. 
 Here she is working on her birds during the hurricane.

These  are her finished birds.  I am so proud of my darlin'- these look incredible! We are going to frame these and hang them in the dining room. She worked very hard at getting her stitches to look like feathers.


This last project is mine! :) I saw this in a catalogue for way too much money so I made my own- I think I am going to make a pillow cover out of it. The moon and witch are appliques. In the catalogue it was framed but I think a pillow would be  much more fun. 


Sunday, September 25, 2011

Tim and Dani's Kitchen Valances

 Last night I delivered  and installed kitchen valances for Dani & Tim , a couple in Chesapeake. They are so nice and so fun! I had a wonderful time drilling in their kitchen :) !


Dani found my website a year ago. She bookmarked me and saved my info until she found the fabric she wanted. She finally saw the right fabric on a tv show, and amazingly was able to track it down!
She had  also seen the valances I did for Doug and Diane's kitchen, last winter  and really liked those.  I visited the house, measured, got an idea of what she wanted and  I then went out and found co-ordinating fabrics for the pleats and piping.
Here is  a close-up of the fabric:


Isn't it gorgeous? I just love it!


Here is the Kitchen before:


I just love the plates. I was a tiny bit sorry to have to move them as they are just lovely.
I think Dani is going to hang them on one of the other walls in the  kitchen.


And after ! :)


Changes to the pattern:

  •  I widened the swag pattern from it's original size. I also shortened it a bit.  Tim and Dani love the light and didn't want to cover too much of the windows so  it cut it to @15 inches long at the longest part. 
  • I also added a bit more "swoop" to the top of the pattern. Tim  (who claims to not know anything about window treatments or fabrics and whom I do not believe one bit :) ) thought that they would look nicer with a bit more dip in the top. So I took it down about 1.5 inches from the original pattern. I know that doesn't  sound like much but when it is in a curve, it makes  a big difference. I made a pattern template where I altered the 'swoop" to be about 3 inches form the original and it looked distorted.  So I halved that and 1.5 was perfect.
  • Side returns are 5.5 instead of 3.5 so I just widened that pattern piece. 
Pieces are cut out and ready to be assembled.  In the background you can see my assistant, Sophie.
She usually lays under the table while I work , supervising. 


I cut the interlining as one piece. The pattern calls for cutting the interlining  like the face- as separate pieces then sewing them together.  That method is fine, but the problem is, there are then three seams in each pleat area.  In the past two of these that I have made, I could not get a nice, perfectly crisp pleat   like I wanted.
This is the swag fabric & pleat fabric sewn together. 
Check out the awesome stripe that I found to go in the  pleats! I had found a few choices and when I brought them over to show to Tim and Dani, Tim chose this stripe. ( Again,  I just don't believe him when he says he doesn't know about fabric ! :) )   The fabric in the pleats is not  seen really, it can be any fabric that just compliments the front.

 I cut and sewed the face fabric, the floral and stripe and then pressed it. Then I used that as my template to cute the interlining as one piece.  This made much less bulk in the pleats areas and I was able to get a nice crisp pleat that laid flat.

Here is the face fabric being used as a pattern for the interlining. This reduces bulk in the pleats! :)


For next time:

I am going to cut the back lining piece  in the same was as I did the interlining, by using the face fabric as a pattern piece. I have a client, Regina, who is looking at the pattern in a beautiful black and white print.  The pattern calls for the pleats to be lining in the back with the same fabric that is in the pleats on the front.  With a black and white face fabric, a white lining would blend in nicely in the back.  This would also cut the bulk in the pleats down to almost nothing ensuring  that the pleats lie the way they are supposed to with nice crisp lines.  In a multi colored fabric, I do think the back of the pleats would need to match the front as they are seen a tiny bit.


The Knobs and Posts: 
are from Pate Meadows. I chose the 5.5 inch projection posts for this to accommodate the window moulding and the pleats behind the valance.  In a perfect world, you could order these to your exact  size- like I really would have preferred a 4.5 inch projection from the wall.  But we live in an imperfect world ( "Screws just fall out all the time, the world is an imperfect place"... Quick!!! name that movie quote!.......................ok, I will give it to you- Breakfast Club.)   so I  had to choose between  two sizes.  The posts come in 3.5 and 5.5. I felt 3.5 was just to small for this room. So 5.5 it was.

The knobs are so so so pretty.


Close-up of the knob. 

Knobs are mounted 2 inches out  from and 5 inches above the moulding on the side windows. Center windows are 3  inches out from and 5 inches above.  The center windows are 1 inch more because if I added those 2 inches, all the swags across all three windows would be the same size.
 I did not use the plastic anchors included with the posts. I also did not use the amazing drywall anchors that I have been using. I didn't use any anchors at all on these because those posts are actually wood and very light. These valances weigh very little. I put one post in and tested it out and it was solid and secure.  As long as no one is playing Tarzan on them, they will be more than fine. They will stay put until they decide to take them down, which I hope is many years away. :)

The door:


The door needed something too. If we had done the windows and not the door, it would have looked unfinished.   I do not think the Delaine valance would well work on doors, so  we did a valance mounted on a board (1 x 2.5 ). It is gathered in the back with button thread at  measured intervals.   Welt cord at the top and bottom.  It also has a depth of 15 inches. The curved bottom edge matches the curved bottom edge of the window valances, so it ties them together.


Here is both the door and the windows. I will tell you, because  I am sure Dani would want me to  tell you, that the ironing board does not live in their kitchen. :)  It is only there because I used  it to give the valances a nice hot press  seconds before hanging  them up.  It makes a big difference in hanging this particular valance. I lay them flat to deliver them but no matter how careful I am, they still get a bit wrinkly en route.  The swags must be perfectly smooth to look nice.


Materials used:
Dani found the gorgeous floral print online. The stripe in the pleats and the fabric covering the welt cording are from Artee fabrics, in Virginia Beach. Cotton interlining and lining are from Rowley. Post and knobs are Pate Meadows. Pattern is the Delaine Valance, Pate Meadows.