Saturday, June 30, 2012

The Bebe Dress Sew-a-long Part.1

  I love Sew Serendipity! I have both of her books and I love them.  She has hinted that there is a third coming out and I  can't wait. She hasn't said what it is about yet and that is just mean & evil. Why tease people? :)   Come on, I'm gonna buy  it- just tell me what is in it!

        I love  her patterns for many reasons but mostly because they make sense. They are clearly written and  well drafted. The designs are all  wearable. I have made a couple of skirts from the first book  and I wear them constantly.  I also love that she mostly uses quilting cottons.

Recently she released a couple of dress patterns and I went nuts over the Bebe dress. Hello! Isn't this the cutest thing ever?   Comfy and flattering and looks darn easy. Sign me up!


I ordered two copies . One for me and a copy for Kristi. Kirsti is my student who moved away. I really miss her. We listened to Lily Allen and talked about Battlestar Galactica  in lesson and had a splendid time. Then she up and moved and left me on Wednesday mornings to sew on my own.  ( EH!!! STOP MOVING PEOPLE! ) . She loves the inverted pleat version. Which is totally cute!   Oh and she ordered the boots in the above photo to go with  her dress when she finishes it! Awesome!

The Bebe Dress

Kristi and I cooked up a plan (without alcohol even- she was a morning lesson girl) to sew it together- her in Washington and me here in Virginia and blog about it.  I can do a post and she can follow along and post as well.  Kristi is still new to the sewing thang and  so this will be her first project completely on her own. Completely on her own with me on  call by phone, email, Skype and text! Yea baby!
At the end  of this adventure you can see both of our dresses! Fun? We think so!!  You can sew a long with us or just read and learn. I hope to put lots of tips that I have learned in my 20+ years of stitching. And learn from Kristi too!

My plan is this- to weekly  take photos of the muslin process, the fabric choosing process, the sewing process and the wearing it out in public process!

Are you ready! Let's sew!


First step:
 Open the pattern! 


This pattern comes with the pattern tissue, an instruction sheet and a full color glossy  cover with lots of pictures.


Read the pattern!!!


       Read through it. Seriously  folks. Read the dang blasted pattern.  More than once. See what you are getting into.  Determine which version you are going to make.  This dress has a lot of variations  and has the possibility of getting a bit confusing  as to which directions to follow. So read it, become one with the pattern.  Lightly circle  in pencil the parts  that pertain to you and the dress you want to make. This really helps to eliminate the instructions that you don't need for your dress.
       Draw  the dress out like you want it.  It does not have to look like a John Singer Sargeant drawing - it can look like a toddler drew it- it's fine! Don't worry if you can't draw for diddly. Neither can I. In fact, to prove it- here is my initial drawing for this dress:


Determine which pattern pieces you will need.  Short or longer sleeves or no sleeves, which length,  which hem , etc. Cut out the pattern pieces that you will need. Cut out on the largest size. That way we can use the pattern later or change sizes later or use two sizes. 
For this pattern I am making the short  gathered skirt  with the short sleeves. 

( I am typing with a band- aid on  my right pointer finger which is my main typing finger and it is driving me crazy! I ripped  a pin through the skin yesterday - on the job injury. It really stings!  Can I file workman's comp on myself....? )  


I cut out the pattern with my rotary cutter and mat. Using the rotary cutter makes it super fast!!


 Once you have them all cut out,  fold them up nicely with the  PATTERN PIECE INFO FACING OUT.  So you can see it quickly. This makes life sooooo much easier! If you get in this habit now,  it will make going back into pattern envelopes  to find one specific piece easy peasy . Otherwise when you need to get a  piece  of the pattern out because oh, let's say you forgot to mark the notches, you don't have to open every single pattern piece to find it.

After I have cut everything out, I fold them with the info facing out  and then I put them into a large ziplock bag.  

Second step:
Photocopy the small pieces. 
I like to photocopy the small pieces like  facings,  collars, sleeves in baby items, pockets,etc. Anything small.  This makes them : 1. easier to deal with and   2.  harder to lose

I photocopied the facings on this pattern. 


That's all for today :) 

Next post: choosing your size!


Friday, June 22, 2012

Some Girls are Bigger Than Others

  I found this pattern thrift shopping with Eden the other day- isn't it adorable? It would just look amazing on Eden in a red velour for christmas.  Look at the dress on the left, in blue. How cute in red with a white collar edged in lace? 
(I haven't even  made our Halloween costumes yet and I am already planning her christmas dress!)
 I put the pattern in the sewing room when we got home and went about my day.  Later I looked closer at the pattern, checking for pattern pieces and I noticed something funny.
 Do you see it?  
Look in the upper left corner. 


Here I will enlarge it   for you.

Suitable for Chubbies!


Uhm... What?  Chubbies?  
 Inside the pattern are instructions  on Fitting Chubby Girls.    Seriously.   
At first I was incredulous  that that was even printed on there.  But some girls are bigger than others.   Everything is so PC these days, it seems so insulting to call someone a chubbie, even indirectly on a pattern envelope.   Then I got to thinking. If  patterns would just print that kind of information on each pattern smack dab  on the front  and not worry about offending anyone , it would make things easier.  Honest and  up front.  No sugar coating.

Here are some I would like to see:

Hides a Muffin Top
Suitable for Fat Bottomed Girls
Not suitable over 40. No exceptions. 
  Only Suitable for Bulimic Models  
Suitable for  Boob Jobs
Suitable for Shorties
  or  more PC
Suitable for the Vertically Challenged


Can you think of any more?? 

Send them to me and I will add them!
:)


Sunday, June 17, 2012

The Mae Dress

Simplicity 5915
This is my new favorite dress.

  I love this dress!!  I made it  a couple of weeks ago but am only getting around to finishing this post about it.   I love this pattern! It is from 1965.  I used it to make Eden's Halloween costume  last year and   this dress :  The Pink Peace Dress.


 I have been wanting to make one for myself  for a while. I chose the view on the right,  the white one. But in black of course! I  do love the gal on the left, and I intend to make one exactly like hers eventually. I love the large gingham check and  it is hard to see in this photo but she is wearing fishnets and pointy toe shoes. So cute!  I need her whole outfit!!!

 I got this pattern in Tennessee last year on spring break when we went out to my dad's farm to visit.   So the pattern was only in my possession for a year before I got around to making it! That's not bad!  I bought it in Fayetteville, on the square in one of the antique shops.  The pattern  I found is a 10T meaning it was for teens.  The size is a 30 bust. Now, I can't recall in  my life being a 30 bust. My 9 year old is a 28 inch chest so I think this pattern was probably meant for what, 12 year olds? Yea, folks were skinnier then, there wasn't any Ben & Jerrys and ranch dressing wasn't invented yet. But still, wow. Small.
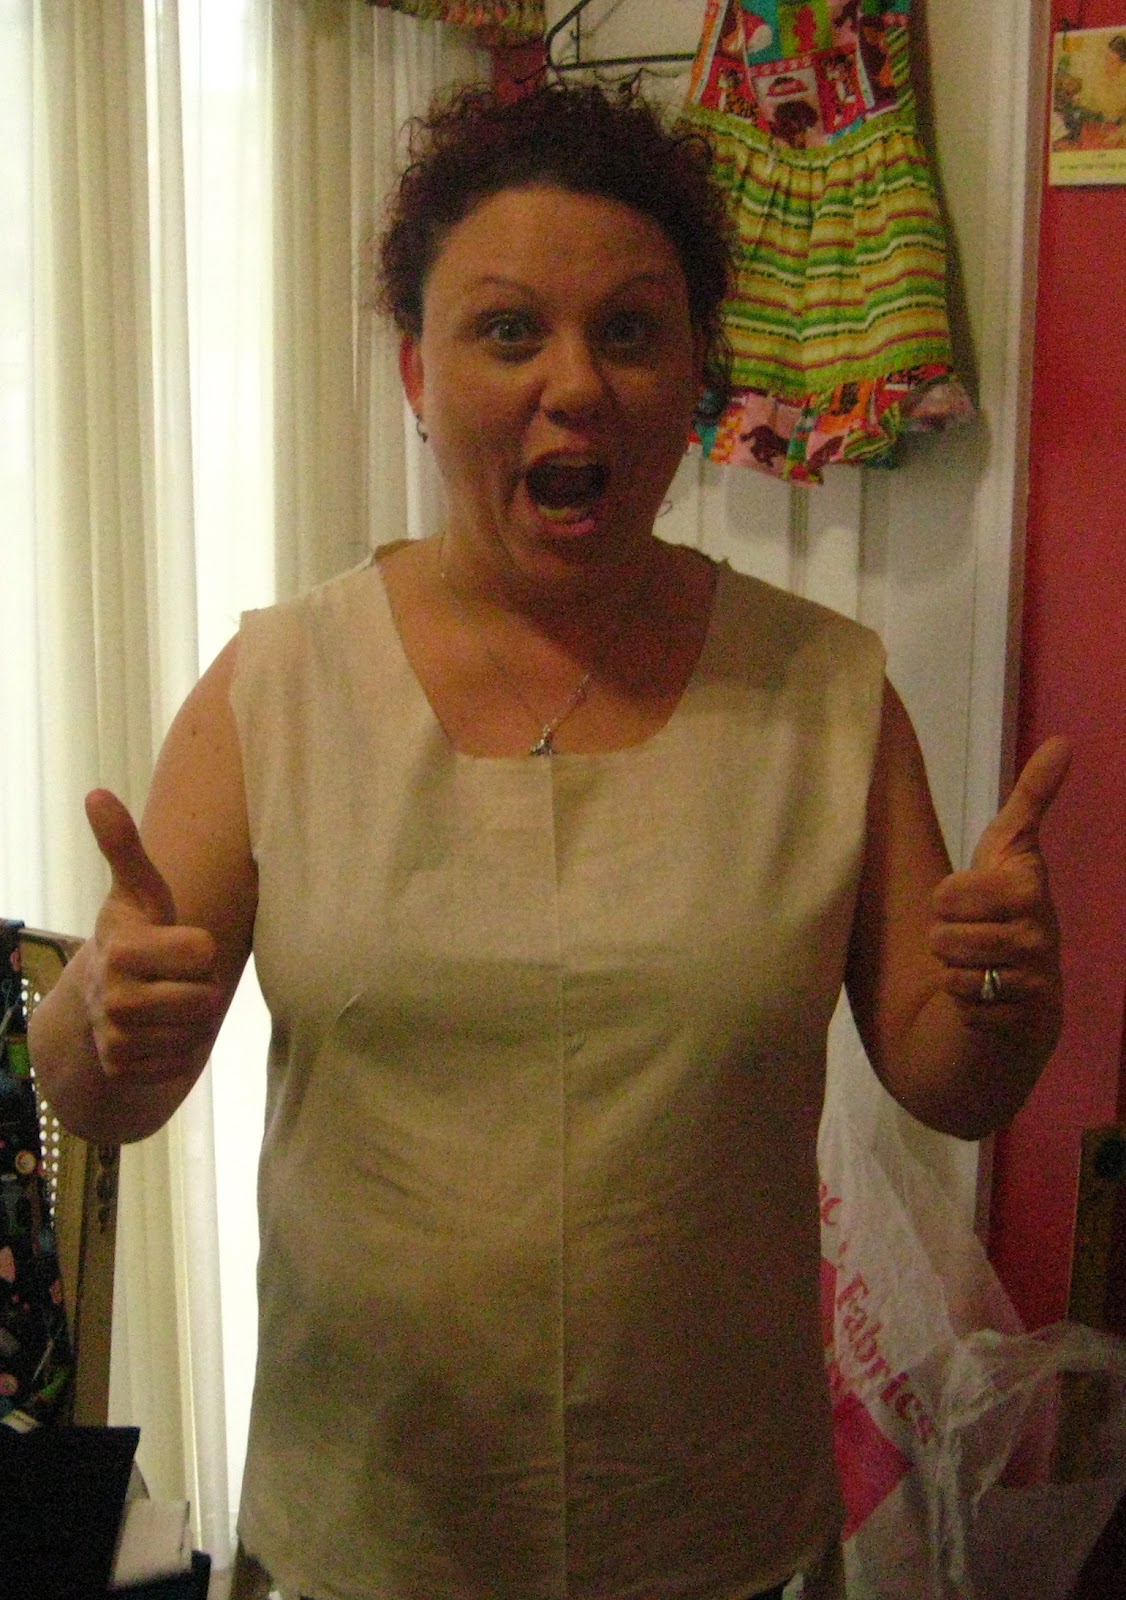
I graded the pattern up, meaning I altered  from a size 10teen bust 30 up to my size. I am not going to publicly tell you my exact inches but I am  waaaaaaayyyyyy above a 30 bust. Yes, I made a muslin. Here I am in all of my muslin glory looking mighty sexy-


I worked on that for a while and fine tuned it and then made the dress.
 I changed the sleeves entirely from the pattern. For this dress, I just had a tiny cap sleeve in mind. I think I  look better in a  shorter sleeve than the pattern has.
There is an invisible zipper in the back that you can't see.
It's a ninja zipper!

The dress is made out of $3.95 a yard polyester  from Hancocks. You know that value section, over where they have the horrid flannel that nobody buys?  Yea, this was in the value  crazy ugly fabrics section. It rocks. I treated this fabric like it had done me wrong and I was getting payback. I took out stitches and did the darts a couple of times and the fabric does not look like it.  You know a dress will hold up to daily wear when you  put it through hell  during the making of it and it comes out lookin' good.

The dress has a natural waistline, not a modern waistline, which is very comfortable.


I lined it.
I bought the lining  at Sir's  Fabrics in Fayetteville, Tennessee in April for $1 a yard. It is the cheap,  cheap stuff.   I adore this color. It is gorgeous!   It is sort of a bummer that it is hidden on the inside but I am sure I will find ways to show it off :) This lining is not too hard to work with as it is  stiffer then the linings I usually use. Sometimes cheap  is better!

I used one of the decorative  stitches on my machine to hem the lining.


 Funny how I have all kinds of pictures of me doing this....
Do other people have lots of pictures of themselves
 holding up their dresses and showing their hems, or is it just me? 


The facings are applied to the lining and stitched on.
Then the lining layer and face layer are sewn together. 

The hem has lace hem tape attached to the bottom raw edge and then the
lace is hand stitched to the fabric. This is my favorite kind of hem!

I love using a pretty stitch to hem linings. My machine has so many stitches and
 I pretty much just use the straight and the zig zag. Sometimes I have to remind myself
that the machine can do  flowers and other cool stuff. 


The Lace Edges :
I wanted to edge the neck and sleeves with a lace. I had about 5 options I kept going back and forth between as I tried to decide. I wanted black, but I didn't want it too floral. I bought a white lace to dye black but then I changed my mind and  just went all out OCD and crocheted the lace. I wanted a width wide enough to cover the edges of the sleeves where somehow, even though they are handsewn, I could where the stitches are. The sleeves really gave me  a hard time. As I deviated from the pattern, I ended up just drafting them from scratch. I went trough two sets of sleeves trying to get these just perfect!

The crocheted lace around the
edges of the neck and arms is the easiest ever!
Each arm piece took about an hour to crochet
 and the neckline took  about 2. 


I had no idea that the dress was wrinkly.  I need to remember if
I am wearing it in the mid day summer sun,
iron it first!
      I had the dress done in time to wear on Mother's day to brunch at the mom- in-laws house.  I didn't have the lace done yet  so here is what it looked like without the lace on the arms and neckline.  Kinda plain.  I wore it with my pearls. It was overcast that day so these photos are kinda gray
That's some craaaaaaaazzzzzzzzy hair.


You could hide an army in my hair.
Seriously. An entire army could camp out
 for a year and not be seen,  ever.


The pictures with the lace on the edge  were taken  in my best bud Elaine's  back yard.  Her flowers were looking so good, I said to myself- Self! Take picture in her yard!! I picked up her daughter from school and while we were waiting for Elaine to get home, Izzy took  pictures of me in my dress.  
Thanks Izzy! You did great, kid!

Sometimes we pretend to be grown adults.
This was not one of those times. :) :) 


The Pin:
My brother gave me this for Christmas and I love it! It is a mama kitty and baby kitty! Just like me and my baby! I love kittys!   I think it looks awesome with my dress. Really goes well with my glasses!

( I used to have a black  cat, or a black cat had me rather, named Saracen.  That's part of why Matthew got the pin for me. He was a huge, pissy, part-siamese, obnoxious  total jerk, darling  of a kitty and  I loved him dearly. He was 14 when he passed.  I haven't had a kitty since because I just want him back , another cat wouldn't be the same.  Plus, I discovered after he passed that all of my horrible sinus  infections and breathing issues cleared up so apparently I was allergic to him all those years.  And am allergic to other kitties.   Bummer.) 


Why I named it the Mae Dress:
   Ok, so most of ya'll know I pretty much stick to one color in my clothing choices. Let's face it- I have been this way since about 15 and  I don't see me changing anytime soon. Black  is my color.  So please stop suggesting butter yellow or light blue for my clothing. Ain't. Gonna. Happen.  :) 
   I realized one day  I gotta start naming these things because if I say I wore the black dress,  which one? They are all black!  Kristi  ( who made this exact dress at the same time as I did in lesson but in a lovely plaid ) sent me a short list of some names and I really liked them. She felt a nice one syllable name was elegant and here is what she said 
"Here's why I see these 1 syllable girl names. It's strikes me as a 1920's feel. Add a low waisted sash and voile. Maybe I'm looking at it all wrong but it's 1920 and 1950's all in one to me and that's the name vibe I get." 
    Some of her options were Molly (can't use it,  have a niece named Molly), Anna ( I knew an evil Anna, can't use it), June( name option for a girl if I ever had another one so  that didn't work for me). So I thought about it- I made it in May but that is a dorky name for a dress. So Mae it is!  Mae is elegant and simple  just like my dress!  (There is that whole Mae West association but I don't mind that :) )
Now I can write to Kristi and tell her I wore the Mae dress and she will know which dress  I am talking about! 
    I know a lot of bloggers name each and every  of their dresses and I have to say, sometimes I think it is kinda silly. But it does cut down on confusion! 


Things I will change on the next version:
Oh yea. I will make another.   Once you have made the alterations to a pattern, the time consuming part is done! Use that work again! I want a sleeveless version. I will place the bust darts a touch lower.  Somehow they moved up on this one and I couldn't fix it because I followed the instructions and trimmed the dart.  (Do not trim a french dart until you are positive they are  in the correct place!!! ) The next dress will be 2-3 inches longer. Maybe change it to a V neck....

Pale, pasty and ready for summer in my hand-made 1965  black dress!!


Sunday, June 10, 2012

Nina's Amazingly Awesome Dress

I MADE MY DRESS!!!!!!

Yesterday was Nina's last lesson  with me. She is moving next week. She has taken lessons with me for 2.5- 3 years.  She started with me when she was so small- now she is 13 and my height!  She  was one of the first  students I had when I first opened up my business.  I am going to miss her- she is a super creative, smart, interesting,  genuinely nice kid.   Her parents hope to move back to this area in a few years and  I really hope this happens! I would love to help Nina make her prom dress in high school! 

My business benefits from the flow of military folk coming through  the area. I always have new students. But sometimes it's a real bummer because I meet the coolest people   and then they move away. I 'm talking to you, Kristi. And Amy , Samantha. and Amanda and the rest of ya's that have moved away.  And now  Nina and her  mom Doris are moving. Stop it people. Just stop the moving.  Or you can move but you still have to come back often to see me for lessons! :)


 Nina wanted to make a summer dress for her final project with me.  She had a drawing she had done of her ideal dress and I found a pattern in my stash that matched it!   We used this pattern: 


I have used this pattern a few times to make dresses and tops for Eden.  Here she is in a  couple of them last summer:

Eden wears all of them often, she likes them as they are very cool  in the summer heat  and super comfy. 

 Nina  first made a muslin   of the dress. We made it out of plain purple cotton so that she could wear it instead of actual muslin.  We made it shirt length to test it out.  It went very well, fit perfect and  her mom says that she wears it to death! 
I knew that this dress  would fit,  I wanted her to make a muslin to  practice the techniques in the real thing. We made straps, gathered the  bottom part, made a lining. I put in the zipper.
Here she is in the practice version. She looks so lovely!


Then we moved onto the real dress. Nina chose her fabrics very carefully. Isn't it so cute on her? 
She LOVES the highlighter yellow fabric.  She told me if she could have a lot of clothes in that color, she would  be very happy. 
The rest of us  would all be blind. But she would be happy. 

She is showing off the ruffle!


Nina's Mom Doris, started taking lessons with me in the new year.  She did the gathering  where the skirt attaches to the bodice.  I was showing her how to help Nina and then  we just did it.  :)  So I think this is awesome- Mom and daughter both sewed the dress with me!

Back View 


Ruffles are the painful part of any garment for my Saturday Girls ( age 9-17) .  They want to add them onto every garment  because they are so cute but they whine like I am torturing them unmercifully when we are doing them.  I have come to realize, that it isn't that the ruffling is  hard or that they don't get it: they don't like them because  it takes a while. It is slow going.  All the pinning and thread pulling and pressing and sewing  very  very slowly  just makes them crazy.  They still choose to do them, as they are cute but I usually end up doing most of it. :)

On the bottom edge ruffle of Nina's dress , I only pinned and gathered  about a 1/4  of it.  She did all the sewing and pressing. And with almost no whining) :) :)  I was very proud of her!
Attaching the ruffle.
Look at that serious face.  She was all about that ruffle. 

I love the tickled-pink-with-herself smile. 
I bet you she doesn't take this dress off for at least a week!


My favorite part of teaching my little ones ( I am sorry Nina, I know you are thirteen and a teenager now but you are still one of my little ones)  is that look on their face when they finish up with an item and put it on. See that picture above?   That's what I'm talkin' about. 


Goodbye, Nina! 
I have enjoyed teaching you! 
Please send me pictures of what you sew without me!!!
I will miss you!


And the rest of my students, take note!!! You  are absolutely FORBIDDEN from moving away!
No more birdies flying away from the nest!


Friday, June 1, 2012

Birdy Baby


Some old friends of my hubby's had a baby recently and I made a couple of outfits for baby Alice. 
The first one was a bubble romper. I used this pattern:   Ruffled Baby Romper. This is an adorable pattern. I actually saw the pattern a while back and  loved it- I just needed to find me  a  baby to make it for! When Graham and Rowan popped up preggers, I  was very excited as  there was a baby that needed new outfits!  
I love to make baby clothes. Some of my sewing projects can get pretty large, like drapery panels or cushions and sometimes it is nice to just sit down and cut and sew little things. 
I made the 0-3 months size . It seemed so small to me when I finished it!  My baby is nine years old now,  I forget how tiny babies can be!  The bottom of the outfit is basically a bubble with a front bodice section and ties to go around the neck. It is fully lined. Easy peasy  and so cute. 
The fabric was chosen special  for baby Alice  with birds on it. Her mama is birdybooty so little birdys were a must! 

This is the front of the romper.

The back view.
There is nothin' cuter on a baby than a bum full of ruffles. 

I was worried that the little bubble romper might be too small so I made another outfit just in case! This outfit is 3-6 months. I have known some babies to wear this pinafore  for the first year or so as it is loose so this is a nice item to make for babies- they can wear it a while.
I  made a pinafore using this pattern:  Ruffled Pinafore and  a little pair of bloomers  to go under it.
The back of the pinafore is a big ruffle  with a bow and the bloomies are covered in ruffles. When  baby Alice  is wearing these, her whole back side will be  covered in fluff. I love covering little babies in ruffly fluff! 

The front.


The back. 


The pinafore with the bloomers underneath. 

The neck and arm edges were wrapped in  tiny double fold bias tape. 

The bloomers were made from this pattern: Ruffled Diaper Cover . I love this pattern. I have tested a bunch of baby diaper cover patterns and this one is the best.

Front


Back. 

I added little labels into each of the items saying what size it is.
I wish I had done this to my daughters stuff I made for her
because now  I have no idea what size some of it  is.  

The ruffles are all done the same way- I cut long strips of fabric and used the 1/8 rolled hem foot to hem the top and bottom edge. Then I ran two strips of basting  threads along the top edge and pulled those to create gathers.  It takes a while. It is easy to do, just time consuming.


The Fabrics:
In these photos the fabric looks kinda yellowish but in reality they are pure white.
This fabric is soooo cute! I love the little swirly birds. And the coordinating fabric is just as cute- the little feathered lines accent the birds perfectly.  I got it on Etsy- the seller seems to be out right now so I will link to them when I see they get more in. These fabrics were $9 a yard- pricey for cotton fabrics but worth it for the cute print! And two baby outfits for $20 isn't bad :) :)

Pink-A-Doodle - Flirty Birds


Pink-A-Doodle - Flirty Birds (6819-23) - Emma by Michele Scott - 1 Yard


Pink-A-Doodle - Leafy Vines


Pink-A-Doodle - Leafy Vines (6820-23) - Emma by Michele Scott - 1 Yard


I have two students pregnant and I just saw last night that one of my former students who moved away ( sniff sniff) is preggo with twins so  you will be seeing the bubble rompers and the bloomies again!
I am going to bug the new parents for a picture of baby Alice in her couture outfits. I will post 'em when I get 'em :)


Happy Sewing!