Showing posts with label Nina. Show all posts

Sunday, June 10, 2012

Nina's Amazingly Awesome Dress

I MADE MY DRESS!!!!!!

Yesterday was Nina's last lesson  with me. She is moving next week. She has taken lessons with me for 2.5- 3 years.  She started with me when she was so small- now she is 13 and my height!  She  was one of the first  students I had when I first opened up my business.  I am going to miss her- she is a super creative, smart, interesting,  genuinely nice kid.   Her parents hope to move back to this area in a few years and  I really hope this happens! I would love to help Nina make her prom dress in high school! 

My business benefits from the flow of military folk coming through  the area. I always have new students. But sometimes it's a real bummer because I meet the coolest people   and then they move away. I 'm talking to you, Kristi. And Amy , Samantha. and Amanda and the rest of ya's that have moved away.  And now  Nina and her  mom Doris are moving. Stop it people. Just stop the moving.  Or you can move but you still have to come back often to see me for lessons! :)


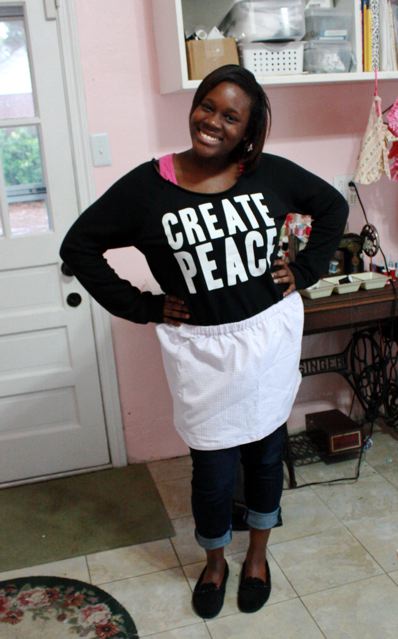
 Nina wanted to make a summer dress for her final project with me.  She had a drawing she had done of her ideal dress and I found a pattern in my stash that matched it!   We used this pattern: 


I have used this pattern a few times to make dresses and tops for Eden.  Here she is in a  couple of them last summer:

Eden wears all of them often, she likes them as they are very cool  in the summer heat  and super comfy. 

 Nina  first made a muslin   of the dress. We made it out of plain purple cotton so that she could wear it instead of actual muslin.  We made it shirt length to test it out.  It went very well, fit perfect and  her mom says that she wears it to death! 
I knew that this dress  would fit,  I wanted her to make a muslin to  practice the techniques in the real thing. We made straps, gathered the  bottom part, made a lining. I put in the zipper.
Here she is in the practice version. She looks so lovely!


Then we moved onto the real dress. Nina chose her fabrics very carefully. Isn't it so cute on her? 
She LOVES the highlighter yellow fabric.  She told me if she could have a lot of clothes in that color, she would  be very happy. 
The rest of us  would all be blind. But she would be happy. 

She is showing off the ruffle!


Nina's Mom Doris, started taking lessons with me in the new year.  She did the gathering  where the skirt attaches to the bodice.  I was showing her how to help Nina and then  we just did it.  :)  So I think this is awesome- Mom and daughter both sewed the dress with me!

Back View 


Ruffles are the painful part of any garment for my Saturday Girls ( age 9-17) .  They want to add them onto every garment  because they are so cute but they whine like I am torturing them unmercifully when we are doing them.  I have come to realize, that it isn't that the ruffling is  hard or that they don't get it: they don't like them because  it takes a while. It is slow going.  All the pinning and thread pulling and pressing and sewing  very  very slowly  just makes them crazy.  They still choose to do them, as they are cute but I usually end up doing most of it. :)

On the bottom edge ruffle of Nina's dress , I only pinned and gathered  about a 1/4  of it.  She did all the sewing and pressing. And with almost no whining) :) :)  I was very proud of her!
Attaching the ruffle.
Look at that serious face.  She was all about that ruffle. 

I love the tickled-pink-with-herself smile. 
I bet you she doesn't take this dress off for at least a week!


My favorite part of teaching my little ones ( I am sorry Nina, I know you are thirteen and a teenager now but you are still one of my little ones)  is that look on their face when they finish up with an item and put it on. See that picture above?   That's what I'm talkin' about. 


Goodbye, Nina! 
I have enjoyed teaching you! 
Please send me pictures of what you sew without me!!!
I will miss you!


And the rest of my students, take note!!! You  are absolutely FORBIDDEN from moving away!
No more birdies flying away from the nest!


Saturday, March 3, 2012

Saturday Girls

 Today was a wonderful day! Today is Saturday and I teach 5 girls throughout the day starting at 9, ending at 4:30.  Today all the girls remembered all of their stuff, sewed slowly and carefully and had fun! I love days like this! 
I am so proud of them, I took pictures today to show off thier creations

At 9 am each Saturday Kayla comes  dancing in the door.  She is so much fun to start the day out with. She makes sure I am awake! She finished her  apron today! Kayla did such a wonderful job of stitching the bias tape onto the edges of the apron
See me in the reflection of the mirror? I am waving at you! :) 
 Kayla added buttons onto the top part of her apron for embellishment. We had planned a pocket but  she changed her mind and just wanted to add  buttons.
 See me again? Behind Kayla?

Izzy is next at 10:30. Today we covered her sewing notebook. I am having each girl keep  a sewing notebook. I write in it each week what we did, homework and our plan for next time. It helps to keep them ( and me! )  on track with what we are doing. We use a plain black & white composition notebook and cover it with a  fabric of their choice.  It is a great one hour project  and they love to use it each week.

Izzy is cutting out her interfacing. 
Izzy chose a piece of leftover fabric from my daughter's  bedroom valances.  I keep all fabric scraps. :)  They are great for projects like this that don't need too much fabric.
Izzy did a fantastic job of hemming the inside  pieces and slowly stitching around the entire  cover!
The outside of her notebook
The inside cover of her notebook. 


Nine is at 12. I am so proud of Nina today!!! But look at these photos- Nina  is even more proud of herself. Look at her smile!  This is the practice version  we made to test out a pattern for a summer dress. We made a shirt first just to check for fit. 


Nina really used her sewing skills on this one-  gathering,  a nice hem, creating straps- she did it all herself! I did put in the zipper for her, we haven't covered those yet.  She will shop for fabric for her dress this next two weeks and we then  start on her  dream version. 


We had 10 minutes left in lesson and she decided that the shirt just needed something. So we looked in my ribbon  box and she found a ribbon that she liked and  we added it where the bodice connects to the lower part of the shirt. She is also going to add buttons where the straps meet the top of the bodice.
I just love how  confident she looks! She is so happy with her work and she should be!
 That smile is fantastic! She is so proud of what she made!

Tori is at 2. She is working on her Pajama pants. Here she is cutting the material. We have already made the muslin version, tested it for fit, altered the pattern to make those adjustments and are on on the real thing. I love the fabrics she chose. She is  doing a black & orange zebra print on one leg and black on the other leg.  They are going to be awesome!!!

I did get a picture of Tori smiling but she would not want me to post it here-  I caught her mid laugh so.... not the most flattering angle! :)  So you get serious Tori face as she is  cutting out her fabric. 

Haley comes to lesson at 3:30. Haley is finishing up her circle skirt.  She is my last lesson  of the day and such a sweet girl- I really enjoy teaching her.  :)
Haley learned the  lesson of wash your fabric before you make your item with this skirt . She found a lovely fabric with small flowers on it, washed the fabric and the flowers disappeared!! She still wanted to use it for the skirt,  so we did but  it is good that the fading happened before she made the skirt. 

Haley put in a lovely half inch double fold hem on her circle skirt. 
The front of her skirt
The back of her skirt. 

The skirt isn't totally finished. We just need to finish off the button flaps and stitch down the waistband.

I told her to please tell her dad that I did not plan  for this skirt to be this short! :) :)  She wanted it this way . She promised me to wear leggings underneath :) !

Saturday, October 15, 2011

Embroidered Summer

This summer I introduced embroidery to my younger students, the 8-12 year olds.    
In past lessons, a couple of them had mentioned that they didn't like hand sewing. Can you believe it? They said that- to me? So after I heard that, guess what I planned? A summer of hand sewing!  I thought summer would be a good time to do this as they would have some extra time around the house and be able to to it at home- not just in lesson. I use embroidery to teach hand sewing skills because it really encompasses it all: threading a needle, tying knots in the end of the thread, sewing and keeping the thread in the needle, making the needle go in and come up where you want,  tying off at the end, etc.  Plus is is fun to sew pictures in thread on stuff. 
I set each girl up with a hoop. fabric, embroidery needle & thread.  I used a dressmakers tracing wheel and pattern tracing paper to transfer straight lines on to practice fabric. Then we learned the running stitch, back stitch, stem stitch and chain stitch. 
We started out on muslin for practicing. We ended the project with embroidering on a t shirt that they could wear to school. Kayla even did one more project and made a bib for her soon to be born cousin! 

Here are some of the girls learning how and also some finished projects!


Madi and Eden
Eden is teaching her friend Madison how to embroider. 

Nina
 Nina loves dogs. So far every project she has made skirt- purse, pj pants has been out of a fabric that features dogs. So I was not surprised when she chose to embroider two scottie dogs on a shirt.   She is intending for them to look" kinda alien" so she has planned for them to be  green and purple and weird colors.
Nina is using a stem stitch to outline her scotties


Izzy
Izzy is working on the chain stitch.
Izzy is 8. This is Izzy's sewing folder. When each girl starts with me, they have a folder to keep handouts and patterns and the other paper things they need to bring back and forth. Izzy drew a picture of me on the back of hers- aren't I gorgeous!!!
Isn't this just the cutest thing ever? 


Kayla made a bib for her son to be cousin. He is a boy and so she designed a bib with an outer space theme.
Kayla really took to the embroidery. She was the main one saying she didn't like hand sewing. She admitted to me this morning, it isn't so bad. :) She is even planning to incorporate embroidery into her christmas presents!


The pattern piece for this bib is a dinner plate! Trace a dinner plate onto your fabric- then use a saucer to draw in the neck area. Cut this out and you have a bib! Bias tape edges make this a really quick , easy to sew up gift. 
We used some iron on transfers from Sublime Stitching for our images. 

This alien is absolutely adorable. Look at her perfect stitches! This could not possibly be any cuter!


We had a hurricane here in August.  We lost power in the morning on the first day and were without it for 6 days. Eden and I sat in front of the window and embroidered. A lot. There really wasn't much else to do!  She worked on a pair of birds. 
 Here she is working on her birds during the hurricane.

These  are her finished birds.  I am so proud of my darlin'- these look incredible! We are going to frame these and hang them in the dining room. She worked very hard at getting her stitches to look like feathers.


This last project is mine! :) I saw this in a catalogue for way too much money so I made my own- I think I am going to make a pillow cover out of it. The moon and witch are appliques. In the catalogue it was framed but I think a pillow would be  much more fun. 


Wednesday, February 16, 2011

Saturday Girls

Every other Saturday is Lesson Day around here. I have 6 girls from age 10-17. I start at 9 am and I finish up at 6. Lesson days are so much fun! I get to hear all about the trials and tribulations of the 5th grade (so cute!) and high school (nope. don't miss it. ) The girls are all so sweet and really devoted to learning all about sewing .
Wanna meet them?


Kayla started with me in November, She had done a bit of sewing with her grandmother but as her grandmother is in a different state, it was hard to keep it up. Kayla is very interested in making just about everything she sees. Each week when I show what I have been working on, I know she is going to say " I wanna make that!" Kayla has finished our first project together- a stuffed heart wall hanging that incorporated some different stitches on the front, her initials and a small topstitched heart at the bottom. Kayla really was careful stitching around the curves of the heart. Great job Kalya!


Next is Rachael. Rach has been taking lessons with me for about a year and has graduated up to patterns! Woohoo! Here she is cutting out her tissue pattern for her Pajama pants. Everyone starts out with the pattern as their first one. It doesn't matter to me if you are 10, 30 or 87- when we move onto patterns you make this one. Why? It has two pattern pieces and is easy to alter.
In the background of this photo you can see some of my recent projects hanging up. There are itty bitty dresses I made for my new baby niece to be Molly ( Steff! If you see this picture before the shower DON'T LOOK!! ) There is also the skirt I made from the Sew Serendipity book. Also the muslin and version one of a jacket from the same book. The jacket still needs buttonholes but I haven't done them yet because I got mad at the jacket. ( Long story. I will tell that one some other time. )


Then we have Nina. Nina is also making the pajama pants. She is cutting out the muslin from her pattern pieces here.

When we make a muslin, sometimes it is hard to tell what side is what . So we write on the fabric with fabric pen. I thought it was cute Nina signed her name underneath the note to ourselves. And put a little smiley face.


This is Haley- world meet Haley, Haley meet world. Haley is so funny we have blast at lessons. Here she is modeling her First Skirt. It is hard to see in the picture but the fabric was actually a really soft white and purple check. She did a really nice job. Currently we are working on a tote bag. We cut the pieces last week and will be assembling next lesson day.

Tori began lesson with me in December. She doesn't say too much but I can see the gears turning in her brain each lesson. She is like a sponge just soaking up all the info. She is working on an envelope pillow here with buttonholes. She got an awesome new machine a few weeks ago and buttons are a breeze. Hooray for the automatic buttonhole setting on sewing machines!
Oh and see my pretty pretty chairs in the background? They go with my pretty pretty new table.


And last we have DAISY!!!! Daisy had to drop out for a little while as school commitments we taking up all of her time. But she is back and we are working on a pair of pajama pants. Daisy has been accepted to a fashion design program for college next year. I forget where... I think it she said Mary Mount up near DC. I think. I will check. Her family is also moving this summer so we are now in cram mode! We have to get as much knowledge into her as we can before she goes. So after this we are going to do as many items from patterns as we can fit in :)!! Here she is cutting out her muslin from the altered pattern.
And that's it- those are my Saturday Girls!

You might say- there are two blog posts in two days! How is she doing this? What lit the fire under her? Well, I am stuck at home with strep and had to cancel lessons. I am also procrastinating finishing up a huge window proposal for a client so I am blogging :) :) :) I have to get out the calculator , use all available brain cells and put all of my crazy notes and samples into some sort of coherent professional looking presentation.
I have also done all of my emailing to clients and students. I checked both bank accounts. Read the news (Hooray Egypt!) . Read MSN gossip ( Charlie Sheen can drop off the planet- I am so sick of reading about him!) . Checked facebook. Looked at slide shows from fashion week. (Really people? Some of those runway fashions looked very badly constructed. ) I read some sewing blogs. I converted a step-by-step off of Sew Mama Sew into Word so I can print it out and work on it down in the sewing room. It will be a cute top for Eden for this summer.
I have run out of things to waste time with so I guess I have to do this proposal ! :)

Thursday, January 13, 2011

Nina's Valentine Project


Nina is 11 years old and has been taking lessons with me for about a year now. When she first started she was kinda quiet. She was very interested in sewing, I could tell, but I would have to ask a lot of questions to get her to say what she liked and didn't like. Then she came out of her shell a little and she started to talk a little bit about her ideas and ask questions. Along the way we did projects geared toward learning basic sewing skills like planning the project, cutting out pattern pieces, working the machine and sewing a nice straight seam. With each project she would get a little more confident with the machine and her sewing ability.
I use a really cute book to get ideas for projects for kids. I usually end up altering the instructions a bit to suit the individual child.

Nina made a cat/fox from the book. The project was a cat or a dog that used many different pieces. She decided to make a two tailed cat/fox. Nina loves animals so this project was really fun for her as she got to combine animals! It turned out adorable! It gave her practice cutting and sewing small pieces. We did not use the method in the book that uses wax paper as the pattern pieces- we just photocopied the book page and cut them out. She had to go slow and stitch carefully around the small curved edges. This project was great for teaching patience and carefulness :) We used some hand sewing in sewing on buttons. Then she did the cutest thing! She glued cotton balls onto the ears and tails to make soft fluffy tails.
Here it is ! :)


Now lessons are hoppin' as when I present our next project, she is just bursting with ideas and ways to make it her own.
Here she is with her first purse that she made. She chose the fabric as it has cute dogs on it. It is fully lined and has a rick rack trim on the front:


For Christmas presents we made tissue holders. We used only hand sewing with this as I am still trying to convince them that hand sewing is necessary. For some reason the young ones think that sewing means just using the machine and only the machine. We also practiced sewing on buttons, tying knots and cutting using the pinking shears. The pinking sheers are hard for the young ones to hold onto sometimes. I am trying to find a smaller pair but so far haven't seen any.

She made this one for her grandmother. I forget why she chose the green fabric and ladybug theme but she had a really cute reason. These tissue holders fit a travel size tissue pack. They are made of felt, which is about .25 a sheet. I like to buy it on sale at Joann's for .19. The felt is very forgiving to young fingers trying to work a hand needle. Each of the Saturday Girls made this project with me in lesson then took home the instructions so that they could make some on their own to give as presents for Christmas.


For Valentines day I had planned a project that we could do in an hour. A year ago, this would have taken us two lessons. Now when I talk about creating a pattern piece, sewing it with the seams showing, using pinking sheers, stuffing, etc. she understands what I am talking about and we can get right to the fun.
I had to project idea for a Valentine's pin- we would cut felt shapes and stack them together, sew them , add buttons or whatever decoration she wanted, then stuff it and glue a pin onto the back. She loved the idea but wanted to change it. She wanted to make a Valentine's lollipop pin for her dad. I think that is just fantastic! We are at the point where she understands the idea I have for the project, but redesigns it. (To me this also means I am doing my job :) She gets it! Hooray!!)

Here she is after creating the pattern piece for the lollipop. I have discovered that people learn the intricacies of patterns easier if they start out making them. So we drew out the lollipop and heart on paper. She also thought that it would be cute if the lollipop already had a bite taken out of it.


She then pinned the pattern pieces down and cut them out of red felt.
She was very good about keeping her fingers back and carefully turning the felt piece to stitch around the curves of the heart. Curves are not easy to sew, especially small ones, like the heart. She took it slow and did an absolutely beautiful job. And see how her fingers are back outside of the throat plate? That is exactly how they should be! :) :)


We use a piece of Peltex for the lollipop stick. Peltex is very thick super sturdy iron on interfacing. I use it for the bottom of purses, to make christmas ornaments and to back decorated pins. Nina then pinned it to the backing and sewed around the edge of the lollipop.

Here is the finished lollipop.


We glued a pin onto the back.

And here is one last shot of the lollipop. She wanted one photo to have the hail in it. As we were finishing up the lollipop it started to hail. It was crazy! Luckily it wasn't the really big car denting kind of hail. Just little granola sized hail.


Nina also wanted the lollipop to say" lollipops are like love" But I told her that she should draw her dad a card and put that in it. There was just no room on our lollipop to write" lollipops are like love" :) :)

Happy Valentines Day everyone!