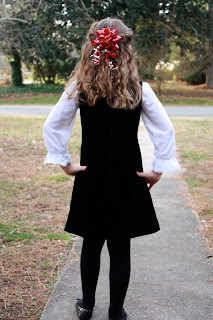
A few months ago I saw this dress pattern on etsy and I had to have it. Luckily, I have a size 8 child to fit it! I probably would have bought it even if I didn't have a size 8 child because it is just so sweet! I love 60's patterns. I love the black dress & white shirt version. How classic! I wanted to make her one exactly like it.
I searched and searched around town for a lightweight white cotton for the shirt. I knew what I wanted but could not find it anywhere. I finally found it at Joann's. It is so lightweight it is almost see through. Eden had a HUGE problem with the idea that it was see through but once I got it through to her that the velvet would cover everything up, she relaxed :).
The velvet I found at Joann's too, after I had ordered some velvet from Fabric.com. The velvet that came from Fabric.com was not what I had in mind. It was very thin. It was described as thick but what showed up wasn't. I stopped into in Joann's for some cording for Stephanie's kitchen valances that I thought I had bought already and couldn't find and HOORAY! they had a brand new bolt of nice thick black velvet .
Here she is before school on the day of her class christmas party.
The dress is lined in cheery red lining. The pattern did not call for the dress to be lined but I really feel that lining clothing makes them sooo much more comfy to wear.

 I used a book on linings for assistance on creating a lining - The Easy Guide to Sewing Linings by Connie Long. I used info in the chapter on dress linings, sewing the un-interfaced lining directly onto the lining, then attaching that to the dress. Here is a photo of the book. ( I have been sitting here forever trying to turn the photo into a link with no luck- :( I'm being outsmarted by blogger. )
This pattern itself could not be more beautifully simple. There are four pieces - front, back, neck and arm facings, that's it! And small too, as it is for a 9 year old. However, sewing the velvet could have been more fun. It slid around like crazy! I had to pin and pin and pin. Also, I could not press the seams down as the velvet would crush and look shiny on spots. I ended up top stitching around the neck and arms to get them to stay down as without pressing them, they just wouldn't lay right.
The hem is done with lace hem tape attached by zig zag and then hand sewn up.
Here is E in the dress sitting on Santa's lap with her cousin Molly.
The shirt was pretty easy to make too. I think it took a total of three hours to complete. I used french seams at the shoulders and all other seams are clipped very close and zig zagged.
The neckline has bias tape over the raw edges of the seams instead of a facing. This worked very well for such a sheer material.
The collar and cuffs is edged in a tiny lace. I had a terrible terrible moment with this lace!! I was giving the shirt a last press with a super hot iron and the iron slid off the press cloth and went over the lace- which I did not realize is polyester and IT MELTED!! Into a glob of ick on the edge of the collar!
(Luckily, I was raised by a sailor and so I have the proper vocabulary for these moments. I said every word I knew and then I made up some!)
After I calmed down, I looked at the collar and realized there was no way I could take apart the collar section of the shirt to remove that section of lace. I had inserted the lace back at step one when I sewed the collar together. I ended up clipping the melted plastic off and hand sewing in a small section of lace to the edge of underneath on that section of collar. - when she is wearing it, you cannot tell at all where I fixed it.

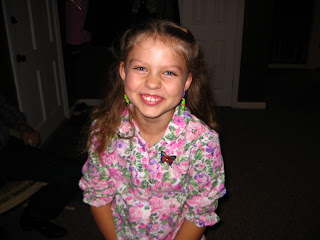
 This picture Eden is wearing the 'muslin' aka the practice version of the shirt. Sometimes I don't make a muslin out of muslin fabric- if I am going to be spending a lot of time on it, I might as well make it out of a fabric that she can wear. This farbic was $1 a yard so if I blew it out of the water, there was no loss. When I made the muslin, we found the shirt was very short, so I added a ruffle onto the bottom to lengthen it. When I made the white cotton version, I just added about 4 inches onto the bottom of the pattern when cutting out.
I made a muslin for the dress as well out of actual muslin and found we only needed to take in an inch on the front and back.
 |
| Eden is sitting on her Grampa's lap, who is also wearing his Father Christmas coat that I made. Pretty cool, eh? |
 |
| E learning the trick to multiplying nines from Aunt Stef. |
The pattern was pristine and untouched when I received it in the mail. I felt a little guilty cutting into a perfect untouched 1960's pattern for notches and using the dressmakers tracing wheel on the darts. But I really didn't want to take the time to trace it. The pattern is still totally usable and anyhoo- the pattern is mine now forever, mwahaha.:) :) I will just pass it down to E to make a dress for her baby when she is older ! :) :)


No comments:
Post a Comment