Saturday, October 15, 2011

Embroidered Summer

This summer I introduced embroidery to my younger students, the 8-12 year olds.    
In past lessons, a couple of them had mentioned that they didn't like hand sewing. Can you believe it? They said that- to me? So after I heard that, guess what I planned? A summer of hand sewing!  I thought summer would be a good time to do this as they would have some extra time around the house and be able to to it at home- not just in lesson. I use embroidery to teach hand sewing skills because it really encompasses it all: threading a needle, tying knots in the end of the thread, sewing and keeping the thread in the needle, making the needle go in and come up where you want,  tying off at the end, etc.  Plus is is fun to sew pictures in thread on stuff. 
I set each girl up with a hoop. fabric, embroidery needle & thread.  I used a dressmakers tracing wheel and pattern tracing paper to transfer straight lines on to practice fabric. Then we learned the running stitch, back stitch, stem stitch and chain stitch. 
We started out on muslin for practicing. We ended the project with embroidering on a t shirt that they could wear to school. Kayla even did one more project and made a bib for her soon to be born cousin! 

Here are some of the girls learning how and also some finished projects!


Madi and Eden
Eden is teaching her friend Madison how to embroider. 

Nina
 Nina loves dogs. So far every project she has made skirt- purse, pj pants has been out of a fabric that features dogs. So I was not surprised when she chose to embroider two scottie dogs on a shirt.   She is intending for them to look" kinda alien" so she has planned for them to be  green and purple and weird colors.
Nina is using a stem stitch to outline her scotties


Izzy
Izzy is working on the chain stitch.
Izzy is 8. This is Izzy's sewing folder. When each girl starts with me, they have a folder to keep handouts and patterns and the other paper things they need to bring back and forth. Izzy drew a picture of me on the back of hers- aren't I gorgeous!!!
Isn't this just the cutest thing ever? 


Kayla made a bib for her son to be cousin. He is a boy and so she designed a bib with an outer space theme.
Kayla really took to the embroidery. She was the main one saying she didn't like hand sewing. She admitted to me this morning, it isn't so bad. :) She is even planning to incorporate embroidery into her christmas presents!


The pattern piece for this bib is a dinner plate! Trace a dinner plate onto your fabric- then use a saucer to draw in the neck area. Cut this out and you have a bib! Bias tape edges make this a really quick , easy to sew up gift. 
We used some iron on transfers from Sublime Stitching for our images. 

This alien is absolutely adorable. Look at her perfect stitches! This could not possibly be any cuter!


We had a hurricane here in August.  We lost power in the morning on the first day and were without it for 6 days. Eden and I sat in front of the window and embroidered. A lot. There really wasn't much else to do!  She worked on a pair of birds. 
 Here she is working on her birds during the hurricane.

These  are her finished birds.  I am so proud of my darlin'- these look incredible! We are going to frame these and hang them in the dining room. She worked very hard at getting her stitches to look like feathers.


This last project is mine! :) I saw this in a catalogue for way too much money so I made my own- I think I am going to make a pillow cover out of it. The moon and witch are appliques. In the catalogue it was framed but I think a pillow would be  much more fun. 


Sunday, September 25, 2011

Tim and Dani's Kitchen Valances

 Last night I delivered  and installed kitchen valances for Dani & Tim , a couple in Chesapeake. They are so nice and so fun! I had a wonderful time drilling in their kitchen :) !


Dani found my website a year ago. She bookmarked me and saved my info until she found the fabric she wanted. She finally saw the right fabric on a tv show, and amazingly was able to track it down!
She had  also seen the valances I did for Doug and Diane's kitchen, last winter  and really liked those.  I visited the house, measured, got an idea of what she wanted and  I then went out and found co-ordinating fabrics for the pleats and piping.
Here is  a close-up of the fabric:


Isn't it gorgeous? I just love it!


Here is the Kitchen before:


I just love the plates. I was a tiny bit sorry to have to move them as they are just lovely.
I think Dani is going to hang them on one of the other walls in the  kitchen.


And after ! :)


Changes to the pattern:

  •  I widened the swag pattern from it's original size. I also shortened it a bit.  Tim and Dani love the light and didn't want to cover too much of the windows so  it cut it to @15 inches long at the longest part. 
  • I also added a bit more "swoop" to the top of the pattern. Tim  (who claims to not know anything about window treatments or fabrics and whom I do not believe one bit :) ) thought that they would look nicer with a bit more dip in the top. So I took it down about 1.5 inches from the original pattern. I know that doesn't  sound like much but when it is in a curve, it makes  a big difference. I made a pattern template where I altered the 'swoop" to be about 3 inches form the original and it looked distorted.  So I halved that and 1.5 was perfect.
  • Side returns are 5.5 instead of 3.5 so I just widened that pattern piece. 
Pieces are cut out and ready to be assembled.  In the background you can see my assistant, Sophie.
She usually lays under the table while I work , supervising. 


I cut the interlining as one piece. The pattern calls for cutting the interlining  like the face- as separate pieces then sewing them together.  That method is fine, but the problem is, there are then three seams in each pleat area.  In the past two of these that I have made, I could not get a nice, perfectly crisp pleat   like I wanted.
This is the swag fabric & pleat fabric sewn together. 
Check out the awesome stripe that I found to go in the  pleats! I had found a few choices and when I brought them over to show to Tim and Dani, Tim chose this stripe. ( Again,  I just don't believe him when he says he doesn't know about fabric ! :) )   The fabric in the pleats is not  seen really, it can be any fabric that just compliments the front.

 I cut and sewed the face fabric, the floral and stripe and then pressed it. Then I used that as my template to cute the interlining as one piece.  This made much less bulk in the pleats areas and I was able to get a nice crisp pleat that laid flat.

Here is the face fabric being used as a pattern for the interlining. This reduces bulk in the pleats! :)


For next time:

I am going to cut the back lining piece  in the same was as I did the interlining, by using the face fabric as a pattern piece. I have a client, Regina, who is looking at the pattern in a beautiful black and white print.  The pattern calls for the pleats to be lining in the back with the same fabric that is in the pleats on the front.  With a black and white face fabric, a white lining would blend in nicely in the back.  This would also cut the bulk in the pleats down to almost nothing ensuring  that the pleats lie the way they are supposed to with nice crisp lines.  In a multi colored fabric, I do think the back of the pleats would need to match the front as they are seen a tiny bit.


The Knobs and Posts: 
are from Pate Meadows. I chose the 5.5 inch projection posts for this to accommodate the window moulding and the pleats behind the valance.  In a perfect world, you could order these to your exact  size- like I really would have preferred a 4.5 inch projection from the wall.  But we live in an imperfect world ( "Screws just fall out all the time, the world is an imperfect place"... Quick!!! name that movie quote!.......................ok, I will give it to you- Breakfast Club.)   so I  had to choose between  two sizes.  The posts come in 3.5 and 5.5. I felt 3.5 was just to small for this room. So 5.5 it was.

The knobs are so so so pretty.
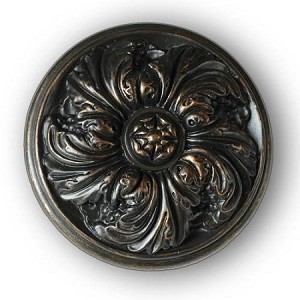

Close-up of the knob. 

Knobs are mounted 2 inches out  from and 5 inches above the moulding on the side windows. Center windows are 3  inches out from and 5 inches above.  The center windows are 1 inch more because if I added those 2 inches, all the swags across all three windows would be the same size.
 I did not use the plastic anchors included with the posts. I also did not use the amazing drywall anchors that I have been using. I didn't use any anchors at all on these because those posts are actually wood and very light. These valances weigh very little. I put one post in and tested it out and it was solid and secure.  As long as no one is playing Tarzan on them, they will be more than fine. They will stay put until they decide to take them down, which I hope is many years away. :)

The door:


The door needed something too. If we had done the windows and not the door, it would have looked unfinished.   I do not think the Delaine valance would well work on doors, so  we did a valance mounted on a board (1 x 2.5 ). It is gathered in the back with button thread at  measured intervals.   Welt cord at the top and bottom.  It also has a depth of 15 inches. The curved bottom edge matches the curved bottom edge of the window valances, so it ties them together.


Here is both the door and the windows. I will tell you, because  I am sure Dani would want me to  tell you, that the ironing board does not live in their kitchen. :)  It is only there because I used  it to give the valances a nice hot press  seconds before hanging  them up.  It makes a big difference in hanging this particular valance. I lay them flat to deliver them but no matter how careful I am, they still get a bit wrinkly en route.  The swags must be perfectly smooth to look nice.


Materials used:
Dani found the gorgeous floral print online. The stripe in the pleats and the fabric covering the welt cording are from Artee fabrics, in Virginia Beach. Cotton interlining and lining are from Rowley. Post and knobs are Pate Meadows. Pattern is the Delaine Valance, Pate Meadows.


Colette's New Bedset


I delivered Colette's new bed set today!   I created the 2 large Euro shams in the back, the three pillows, the bedskirt and the accent blanket. 


  The solid colored bedding and blankets were purchased. 


The thing I call an accent blanket on the end of the bed is really cute.  The edges are scalloped which  echos the edges on the solid blankets.  I don't know what they are called in the real world - you see them in hotels and in magazines. My husband sees no point in them- it is not really a blanket , it does not keep you warm- What is the point? Why not just have a real blanket  instead of a pretend one?  
Beause they are  relatively inexpensive as they use little fabric, and it is  a great way to add a little more pizzaz to a room . And because they are pretty!   And just because... does everything in the world need a logical reason for existence?  :) 


I love the pillows. Pillows are also a fun, inexpensive way to add  personality to a room.

White cording  was added to the edge of this envelope pillow. 
I remembered to take close-up pictures of the pillows right before I delivered them - those are my new Living Room panels in the background :)


Colette is not a frilly type of girl, so I suggested  pleats instead of ruffles on the  striped pillow. She liked that idea.   (I tried to use my ruffler foot to do the pleats but  the ruffler foot is  pain  in my beheiny as it only cooperates with me about once a year. So I pleated by hand- it really didn't take  long.)  


I am on a roll lately, rocking out the custom work.  (It's amazing how much I can accomplish now that my darling daughter is back in school. :) ) 

Next up are panels for Colette's window. She has a beautiful large window in her room. I am going to create  panels with tiny pinch pleats at the top out of white twill , with buttons at the bottom of the pleats. They will be banded on the sides in the floral  (so that the white panels don't show the use  from her opening them and closing them each day. ) 

Tuesday, September 13, 2011

Getting ready for Halloween

Eden wants to be a vampire for Halloween this year. She says she does "not want to be a modern vampire, I want to be a classic vampire". Ok. A classic vampire it is. She would like a cape, black on the outside and red on the inside. She wants a short, fluffy dress. She liked last year's dress but the long dress part got in the way while trick or treating. She wants lots of ruffles and pace because classic vampires have "that old timey look" .


 Sooooooo here is our plan:

 Cape:

 I searched in the pattern box and found this pattern. We are going to make a short version of Cape B, black satin on the outside, red satin on the inside, as requested.


Dress:

I used this pattern as my base. I love this pattern! It is so pretty- I want  version 2 on the left for me! I want it in black and white check, with ruffles - just like the drawing! 

I tissue fit it on Eden and it seemed to fit well.  It was a tad bit big but not too bad. (I grabbed this pattern image off of a google search- scanning in my pattern would require effort that I don't have)  The size I used was a 10T chest  30.  Eden is a 26 so I figured I could take it in in the back and on the sides if it was way too big.

I made my muslin from a pink fabric that Eden picked out a couple of months back. I get tired of sewing on real muslin sometimes...it's so...blah.  Plus, if the test works, Eden can actually wear it. Making muslins are essential but sometimes I get frustrated at spending so much time on a non-wearable item. 

Here is the wearable test muslin!


It looks nothing like the pattern does it?  :)  I changed it all around. I made the pattern just like it is designed at first, though I ignored  the front darts (because Eden is...let's just say it- darts are for curves and my little darlin' doesn't have any yet ) and  it was soooooooooo big.  I removed the neck facing and then added tucks down the front center to take in the fabric. That took the front in 4 inches. The dress was very low cut so I added a neckline  about 2 inches wide. That brought the neck up to a much more comfortable level. Eden wants puffy sleeves so I just made the sleeves wider when I cut them out and gathered the new extra material at the top of the sleeve. I added elastic inside a casing at the bottom edge of the sleeve. That helps increase the puffiness.


 The back is pretty much exactly like the pattern. I took in about 4 inches on the back seam too.   I used an invisible zipper. Regular old double fold hem at the bottom.


I think she likes her new dress. 


I wish I had some of the socks she had as a baby- the white ones with super ruffles on the cuff. That would be adorable . She needs some saddle shoes too!

On the one for halloween , we will just be using the top of the dress. Eden likes the dress  but for her costume, she wants a wider twirly skirt  with a ruffled crinoline underneath. I did try to cut this dress with more skirt but it seemed to just fold up at the sides of the dress- it wasn't twirly. So I moved the side seams back in to about their original position. There will be no yoke-collar-neckline-raising thing on the halloween version.  I will cut the neckline much higher and just use creating a facing. I will also take out 4 inches form the front of the pattern, and 4 inches from the back. Though we both like the tucks, she doesn't think her costume needs them. 
She would like the dress to be red. I am pushing for a red and white crinoline  and white tights and black shiny shoes. I think that would be so cute!  Vampire teeth and  white make-up  and we are done! :)

The skirt will be a circle skirt using the circle skirt pattern from this book:


I love this book! I have made tons of skirts from this book and they turn out perfect every time. 

Off to sew!


Tuesday, July 5, 2011

Student Creations

It has been a very busy few months around here . All of my students are busy making wonderful things! I usually put these photos in my monthly newsletter that I send out to Students & Clients. But I found that this month, there were too many to fit into the newsletter and have it fit in anyones email box!! Here area few of my students with the fantastic projects they have completed.

First up is Nina:
Ok. The universe needs to put it's hands together and make some noise for Nina. Nina worked so hard on these! This is her first item of clothing from a real pattern. These took a couple of months of lessons to complete. Nina's perseverance paid off- how cute do those jammy pants look?


We added a ruffle on the bottom. We did this for two reasons :
Reason #1. I want her to look at patterns as a basic starting point , not a list of rules to follow. Adding a a ruffle and any other embellishments makes each item you create your own.
Reason #2: I swear the child GREW 3 inches from when we first measured for her muslin to when we made the real pants!! She tried them on before we did the final hem and they were short! Adding on a ruffle is a great way to elongate pants or skirts. Nina worked very hard on these and I am sure she is going to wear them every night!!


Haley made a tote bag and I love the fabrics she chose!


Haley was soooo excited to take her tote bag to school and tell everyone she made it! Her bag features a lot of pockets. the great thing about my tote bag pattern is that it is really easy to personalize it to your needs.


Kayla finished her first skirt! Her fabric is sooo pretty. It was a heavier weight cotton and it really lent itself well to this project. Kayla made this pattern her own by adding pockets!! She also wanted to use use bias tape along the bottom edge to finish off the hem. Watch out for Kayla- she is a little designer on the way to the top!


Here is Kate working on her summer skirt. I don't have a photo or the finished skirt on her but I will harras her unmercilfully 'till I get one. I just think this photo is cute :) Kate is pretty much this smiley all the time!

Also- look in the background- see the curtains? The red & gold ones? The don't match my souther pink walls? Those are the pinch pleats I made for Bonnie' s den. Pinch pleats need to hang for at least a week in the drawn back position to "train "them. So I hung them in the studio where I could pet and adjust them constantly. They turned out great.


Sam has been a tote bag making queen! Here is the one she made for herself.


Sam also made tote bags for her mom & mother in law.
Look at the cute ribbon detail she added to the top of the pocket and along the top edge of the bag.
I am very sad as Sam is moving this week to Georgia. :( Hopefully, she will keep sewing as she is a natural!

Donna made a beautiful skirt for summer out of a gorgeous floral embroidered cotton. Donna added a ruffle at the bottom of her skirt. Adding a ruffle to any pattern adds a bit of embellishment and style.
This cotton is just lovely. It is a great summer skirt as it is light and airy. All this skirt needs to go with it is a beach and cabana and fruity concoction with an umbrella in it!


Tori just completed a zipper purse to kepp her makeup and stuff in on her dresser. This is her first zipper project and I have to brag on her- it is perfect!

The pattern piece for this is a sheet of printer paper!


Coming up next month: Leticia;s 1950's "Walk Away" dress, Donna's summer dress, and the Saturday Girls are all working on embroidered t-shirts!

Sunday, June 5, 2011

Eden's Summer Dress McCalls 6067

Summer! It's almost here! I see hours of beach time and fancy drinks with umbrellas in them. My daughter and her friends will play in co-ordinated beachwear, like a J Crew catalog photo. My friends and I will smile graciously down upon our darling offspring in our color coordinated suits as we delicately sip our drinks, discussing politics and the best years for our favorite wines.

Eh- who am I kidding ? :) It is going to be hours of sprinkler time and our drinks will probably be wine from a box. Mixed with fruit if a miracle happens and one of us gets our act together and cuts up fruit to put in the wine. We will most likely be discussing RHONJ and what we can make for dinner that doesn't require any effort or actual cooking. All of this will be accompanied by the aroma of bug-spray.

Ahhhh summer. Sweet Off scented summer.

I made Eden a summer dress last year. Each year I make a couple of dresses for her to wear for the season- nice cool cotton dresses that don't require any ironing- just pull from the dryer and slip over her head as we race off to whatever adventure we we have come up with.

Last year she chose this pattern view C:


It looks wonderfully comfortable. We both thought it would be perfect for the family trip to the Nags Head, NC. Ya know when you get back from a wonderful day at the beach, you take a shower and you just want to put on something soft and comfy? This dress is just perfect.
She picked out a cute cotton in a lovely aqua blue that matches her eyes with butterflies on it- and flowery lace trims. I love her to take part in the planning of her clothes. It gets her in the habit of thinking about a project before starting it.

Up until last summer, I could just measure her and make her clothes. No muslin required. It was awesome! I could just cut, sew and put it on her and it fit. I made this dress according to her measurements, put it on her and it was a tad too big. Eden FREAKS when clothing is too big. So she refused to wear it. So I said FINE! and hung it up in her closet to wait a year. The pattern has a bit of ease in it and though I thought it was just right, she felt it was too roomy. I brought it back out a week or so ago for her to try on and she now feels it fits her perfectly.

Now whenever I make her something, I am making a quick muslin to check the size. My baby is so big! She has to be fitted now!


Here is my shy little princess that I coaxed and persuaded to model for me.
No, not really. I said "Hey, lets go out and take pictures of you in your blue dress", and then there was a giant boom of the sound barrier being broken in her rush to get outside.


The back is lovely. She loves the tie at the neck. My only issue with the dress is that I made it according to the pattern and I have to say , the finished zipper didn't thrill me. It is too exposed. I need to put a hook at the top, that might solve the problem. She has on her nice shoes as we were going out to dinner but I see flip flops in the future.


Even though it is a halter top, she is pretty well covered up. The sides go high so she isn't showing any side ribcage.


I am going to totally steal the format from Pattern Review.com and fill in the rest of the details about this pattern:

McCalls 6067


GIRLS' AND GIRLS' PLUS DRESSES IN TWO LENGTHS: Dresses A, B, C with midriff and gathered skirt with back zipper closing; dress A has neck casing; dress B has drawstring neckline; dress C has extended ties and trim; dresses A, B lengths are above mid-knee; dress C length is below ankle.
NOTIONS: Dress A − 20" Zipper, 1 Yd. of 1/2" Elastic, Hooks and Eyes; Dress B, C − 12" Zipper, 3/4 Yd. of 1/4" Elastic, Hooks and Eyes; Dress C - also 11/4 Yds. of Approximately 3/8" Trim and 11/4 Yds. of Approximately 13/4" Trim.
SUGGESTED FABRICS: Lightweight Broadcloth • Lightweight Poplin • Lightweight Piqué. Additional Fabric may be needed to match stripes, plaids or one-way design fabric.
Pattern Sizing:
7-14
Did it look like the photo/drawing on the pattern envelope once you were done sewing with it?
yes
Were the instructions easy to follow?
very easy.
What did you particularly like or dislike about the pattern?
I did not like the zipper. I think next time I would try to use an invisible zipper as at the top of the dress, the elastic on either side of the zipper seem to pull it apart. I liked how easy the top was to assemble.
Fabric Used:
cotton
Pattern alterations or any design changes you made:
none
Would you sew it again? Would you recommend it to others?
yes yes