Tuesday, July 30, 2013

Ch-ch-ch-Cherry Bomb!


 Happy Summer!! I realize I haven't written a blog post in months,  since last year even.  I have been  super busy with lessons this year! And sewing when I get a chance.  There hasn't been much spare time for blogging. :)
I had to write a post  about my most recent project. I made a swimsuit!!!  YES!!  And I love it! It is the most wonderful thing ever!  I wore it for the first time on our family vacation in Nags Head, NC.  I played in the sand, splashed in the freezing ocean,  swam in the pool, chased kids and dogs and it was fantastic!
 I have been obsessing over this pattern for about a month now.  Testing for fit,  altering,  ordering fabrics, sewing and   trying to find a support solutions.  It was all worth it as it is perfect!
 That's my Sophie playing in the water. She is my furry kid. :) 
This pattern popped up on the Sewaholic blog  one morning.   The Bombshell Swimsuit by Closet Case Files.  I followed the links,  checked it out and  then flipped out completely!  A retro styled one piece! So cute!!!!   Exactly what I have been searching for! I bought it about 45 seconds later.  And it's only $10!!!

 I made  a test  suit in black spandex to test the fit. See lower in this post for info on that one.


I ordered the fabric from Spandex House.   I love this cherry print!  It is so fun! I also ordered  a black with hot pink polka dots as I plan to make another suit before the end of summer. :)

Pictures


Changes I made to the pattern:

  •  I lengthened the pattern by one inch.   When I was wearing the test suit, I kept tugging it up.  One inch was all it took to fix that! 
  •  I changed the  halter top to over the shoulder straps.   When  I wore the black test suit,  the halter cut into the back of my neck. It was incredibly  painful.  To get the suit to hold up my girls, I had to really tie that halter tight.  It felt like  a constant karate chop at the base of my neck! OW!!   I  found an old strapless bra  with optional straps that didn't quite fit great,  but would work for swimming in a couple of times a year. I thought I would sew it into the suit  and that would hold the girls up on it's own, taking the pressure off the halter on my neck. When I tried it on, I found that I  still needed the  bra straps attached to the bra to hold everything up. So I made 2  long straight straps  out of the cherry fabric and sewed them on  to cover the bra straps.  This is SO much more comfortable!! As I am wearing a bra with the suit, I did not sew bra cups into this  suit. 

A bra is hiding underneath the suit straps!!!
I am wearing a bra and you can't see it!!! :)

Sophie had so much fun  playing in the water! She loves the ocean!

  • I stretched the elastic  when I inserted it around the top of the bodice. The instructions say to sew it in at a 1:1 ratio, I stretched it just a little.  I discovered in making my test suit, that not stretching it results in  a wavy, curled up edge.   I cut off about 3 inches from the top front  bodice length of  elastic.  

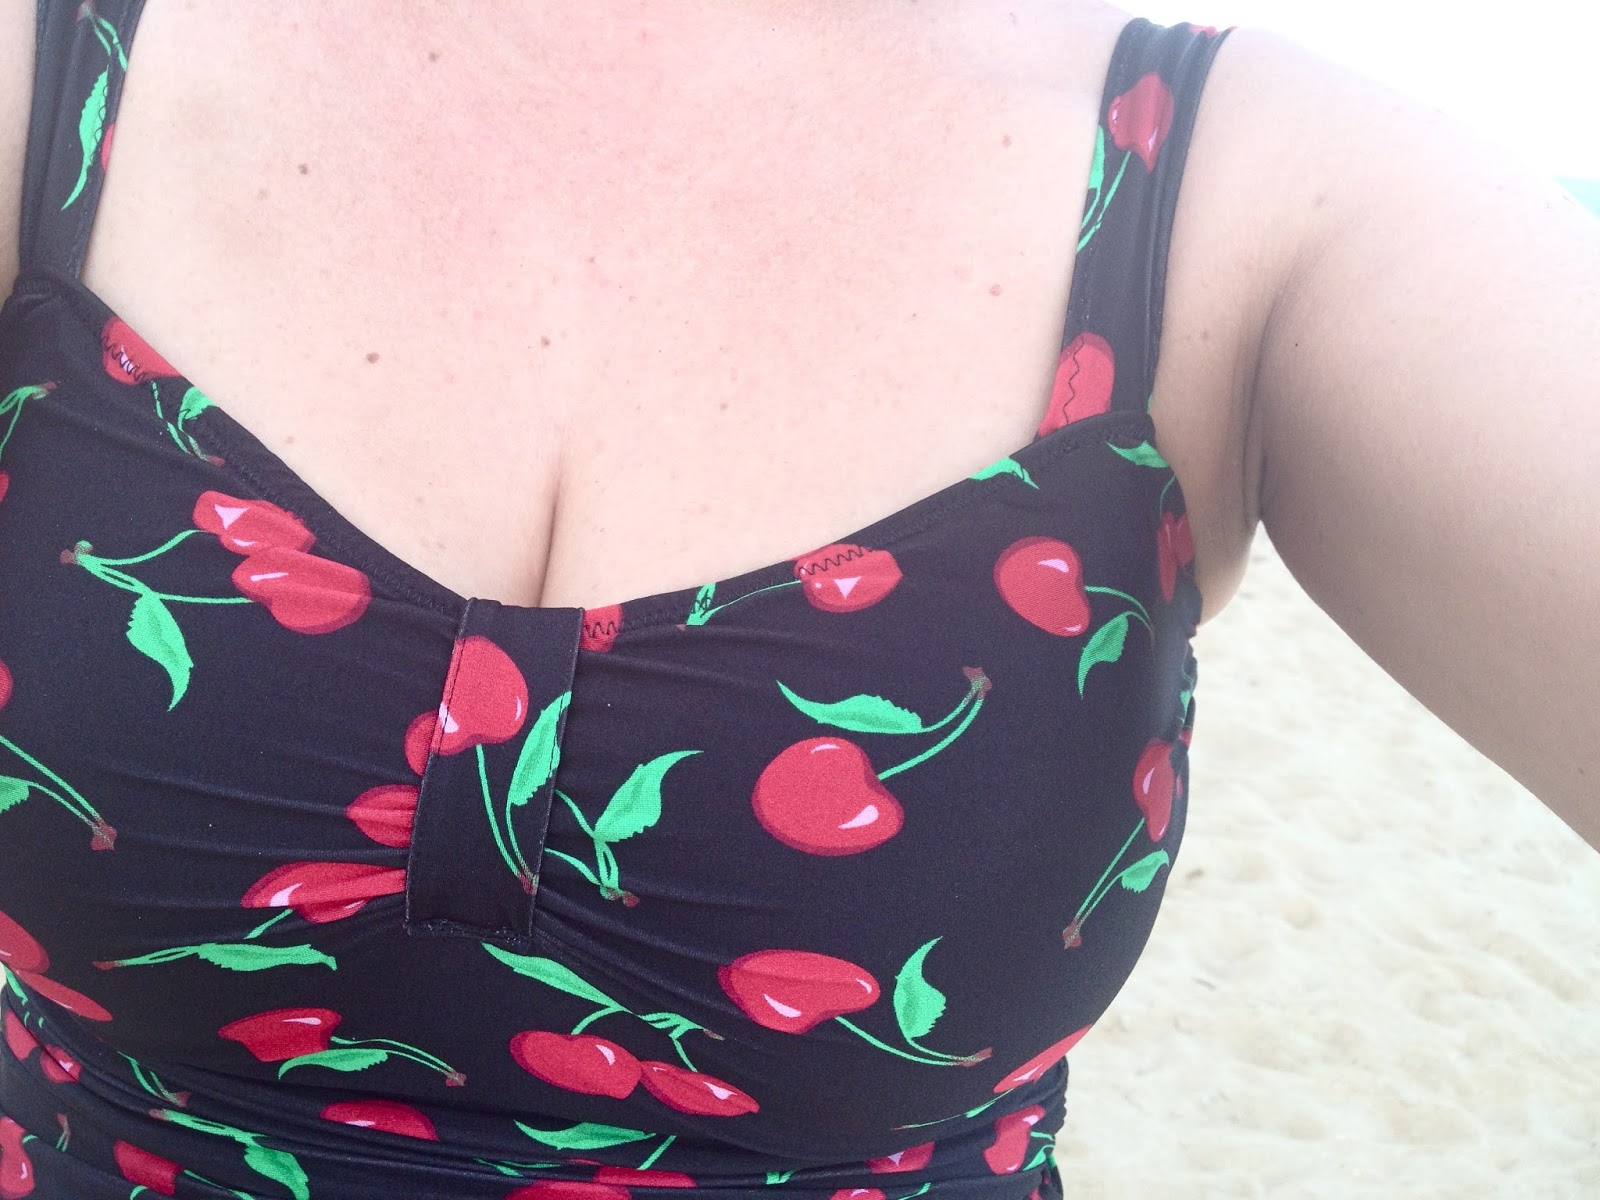
 I used a zig zag to top stitch the straps . 


  • I cut a 14 at the top, 10 on the bottom sides , and the back seam center seam cut to a 14 at the top tapering to a 6  at my bum.     No droopy fabric hanging down over my pale booty cheeks!! Woohoo!!!!   
   I have read each blog post  that every  gal who has made this before me has posted. So far, it seems like  most gals could either make one size all over or they made a bigger size on the bottom. I had to do the opposite- make more room on top and take in the bottom. So if anyone out there reads this  who has no junk in their trunk,  and the  fabric on the butt  of the suit just hangs  off ya, you can fix it by taking in that back center seam. Don't touch the sides.

Hello Internet!  Behold!    My  derriere!

This is the back piece all gathered and basted to the lining in before it was sewn . 

  •  I  changed the center tie a  little bit. I lengthened it by two inches.    Then I  sewed it closed on one end, before I turned it right side out.  It means you see the top stitching where it is sewn down, but I liked it better then the instructions said: sewing it and flipping it over.  On my black test muslin, I could see the  little bit of fabric underneath and I thought I could neaten that up a bit. 


 So here is where I tell you about how awesome this bathing suit is.  OMG it is AWESOME!!!  I loved wearing it and I have never said that about a bathing suit before!    I have had a hard time over the past few years finding suits that fit.    I found my self desperate for anything to wear on vacation  and resorting to buying  "mom suits". You know, the dress swimsuit that tries to hide everything  and kinda does but you feel like a giant whale wearing it.  They are not fun. They are not flattering.   This swimsuit is FUN! And flattering! I didn't feel like a whale, I felt like the bomb! Ch-ch-ch-Cherry Bomb!!


This suit is also great for lounging on a float in the pool.  Someone get me  frosty, fruity,  umbrella topped beverage please...

I know I have funny lips in this photo. :)
I think I was  mid word when non-furry kid took  pictures for me. 


Other info about this pattern:

  • It is as  smooth as butter to sew!!   While sewing it I had the Kindle open with the pattern instructions on it and my phone open to the Sewalong.  I had no problems at all with the pattern! Everything was clear. The instructions are fantastic!  When I first read the pattern, I could not see the "bombshell sandwich" step in my head.  But when I got to that step, it was clear as could be. 
  • I bought a brand new pack of stretch needles  just for this project. I had no skipped stitches at all. 
  • The gathering of the sides of each piece seems like it takes fooorrrreeevvveeerrrrrrr.   Both sides of both back pieces are gathered and both sides of the front.   It is totally worth it in the end!

 Here is  a tip on sewing the gathering stitches:    Set the machine at the longest length stitch.  Place the   fabric with the RIGHT SIDE DOWN.  This puts the bobbin stitches  on the  right side of the fabric. When you are gathering the front   or back pieces of the  suit  and attaching them to the lining,  this makes it so that the bobbin stitches are up  on top and easy to get to.    :)


The (Wearable) Test 


  I bought some plain black spandex 50% off  from Hancock's to test out the pattern. I knew I was going to have to do some specialized fitting so I wanted to make one out of something cheap. I had to do a test run  to resolve my fitting issues:     1. I have no bootay.  Baby's got no back.  2.   I have an  amazing rack! Seriously, these girls are huge.  I never fit into one piece bathing suits  due to these issues. If it fits the top of me, it hangs on the back of me.


I cut a 14 on the top tapering down to a 10 at the hips.  I found that the top fit well but    I still had fabric hanging down  over the hemmed back edges. I tried to go back in and just sew a larger seam allowance  just in the butt area but I could only take it in so much.  When I made the cherry suit, I tapered down to a 6  on that center back seam instead of a 10 just in the booty area and that took care of all the fabric  droopiness. 


This photo is a picture of the excess fabric on my bum. 

The suit has swim bra cups sewn in. I cut them out of an old bathing suit. I also went back in and sewed a line of elastic under the bust  to create a sort of shelf bra.   I don't know that that did anything but I thought it couldn't hurt.


 In this test run, I also tried out something that is in another bathing suit of mine. I sewed a band of powernet into the suit, onto the lining. This was supposed to just pull in my middle, making it look like I have some kind of shape.   I thought it worked great until I saw this next picture.  The powernet did pull in my middle,  that part worked, but it just squished it up over the  top and under bottom of the band , so you can see right where the powernet is!!!  My back looks lumpy!!  Not good! Not attractive!! So I skipped the power net in the cherry version. 

My powernet idea totally backfired.   It was supposed to smooth everything out
but instead it created weird lumpiness. 
 The test  suit is wearable around the house, watering the garden, washing the dog, etc. I won't wear it out in public,  but it will do  in a pinch!

 This next picture is the top of the bodice with the elastic sewn in at a 1:1 ratio.    When I tried it on, it looked like I had  "clam shell boobs". It was super wavy on the top edge.  On the cherry suit, I  stretched the elastic as I sewed it in. That solved the  clam shell boobs problem. On this suit, I  ended up unpicking all the  stitching and sewing  the elastic back in, stretching it  as I sewed it. 


So that's it.   My amazing swimsuit.  I love it!   Happiness on the beach! If  anyone is on the fence about this pattern, just  do it!!!   :) :) :) 


Sunday, October 28, 2012

Doug & Diane's Dining & Sitting Room Valances

Hello!
     It has been a while since I posted.  I have been pretty busy with lessons, halloween preparation, a kitchen redo and just life in general. :)
    I have also been working on valances for  Doug & Diane.  This time I was working on their dining room and  joining sitting room.   I have now done  the windows in 5 rooms on their house :)  They are so fun and so sweet, I love going to visit them!
   For the SR and DR they wanted valances.  We chose  the Catherine valance from Pate Meadows Patterns.  I love the updated swag and jabots of this pattern.   It is classic and tailored but still has a modern quality to it.


      Diane wanted a fabric that  evoked Williamsburg.  Doug didn't want anything that be  considered country.    They both  wanted color POP!  We have used red in each room of the house and so I made sure the Fabrics that I looked at  had dominant reds in them .
           When I saw this fabric I knew it was the one.  I still had some other for them to choose from but this one is just perfect. I love the large bold flowers and the blue vines.

     For finishing  the edges, Doug didn't want anything with an tassels or funny business on it.  I did still  take a couple of trims to show them ,  even though I knew he wasn't going to go for it, because I had to try! I have seen versions of this valance that had a tassel trim on the bottom edge and they were gorgeous.   He picked a  beautiful  red twist cording  from the trims I had brought  to choose from.
    The contrast fabric on the inside of the jabots and the horns  is a smooth creamy satin. It matches the walls almost exactly  and peeks out  of the bottom folds of the jabots.

The valance is very straightforward to make.  After making a number of Pate Meadows designs, I have their method of construction down pat.  The sewing part of the valance did not take  too long, however the altering of the pattern and cutting it all out took fooooorrrreeevvveeeer.
    The swag valance pattern piece unaltered is about 40-42ish inches long.  The fabric repeat of the large flower was 36 inches. I had take the inches out of the pattern piece so that I could allot 1 yard for each swag. The altering took a while because I had to evenly distribute what I took out. That took all my brain cells!   I then had to alter the jabot and horn pattern  piece as well.
Then I had to cut them out. My husband called  when I had the scissors in hand about to make the first cut. I was so relieved for an excuse to stall in cutting!

     Once I cut the first swag,  I used it to cut the other pieces. that way they would all be the same.  Then I cut interlining pieces , lining pieces and contrast pieces. Yes, a lot of cutting! Then I stacked all the pieces up on one end of the dining table  and there they stayed as I worked on them for a month. I couldn't store them in the sewing room as I have had lessons out there and the spare room was full of kitchen cabinet doors  being re-stained.  My husband did eventually ask, hey are these ever going to be done and off the table? :) 

       This pattern is a yardage eater!!!  Each swag is a little over a yard and each jabot is a yard.  I had to cut out of the center of the fabric, making it impossible to salvage any  leftover fabric to use for anything else.  It hurt me  a little to throw the cuttings away. This fabric is gorgeous!


This is the dining room valance. It is 88 inches long, 
The dining room before .

       I love the red cording on the edges of the valance. It frames it gorgeously. I will confess, It is not one of my favorite things to sew. It is just thicker and therefore isn't super flexible or co-operative.   Most of the edges in this valance are pretty straight so it wasn't too bad.
I bought out most of the red twist cord in Hampton Roads because I needed large continuous pieces.  I had to go to a couple of stores and buy all they had. And then  wait till they got new  stock in to get more :).


 For the side jabots, the pattern has you make wooden pieces that attach onto the wall  under the rod bracket and then the  jabot return attaches to the wood.  I made the wood pieces but ended up not using them. 
I hooked a ring onto the bracket and attached the return of the jabot to that. I liked it better than  the wood. 


Dining room 
 The rods are solid wood and  lovely. I wanted to use wood rods as   Doug & Diane have lots of gorgeous wood pieces in these room.  The wood rod  ties it all together.
The sitting room  
The sitting room before. 

The Fabric:
The  red and blue is from Artee's in Virginia Beach. I used to love going there but they are under new management and I have to say, the guy running it now has kinda turned me off to the store.  I was confused by the lack of customer service and put off the the holier than thou  attitude of the manager. He was really rude to me directly  and I find that I do not want to repeat the experience. It is a shame, I used to really love going there.
The contrast cream satin  on the inside of the jabots and horns is from good ole Blaneys in Norfolk.  They have been there since the dawn of time and will probably be there till the end of time because hey have good customer service.  I have used this satin often as it is a dream to work with and comes in lots of yummy colors.
The linings are  flannel  interlining and roclon rain no stain ivory cotton.


The hardware:
is from Lowe's.  In the window treatment  hardware aisle, in the first section is a collection of Allan & Roth mix and match wood rods and finials. They are great quality and a  great price for decorator rods.

The pattern is:
Catherine valance from Pate Meadows Patterns.  All Pate meadows patterns are awesome.

Saturday, September 22, 2012

Aida's Tote Bag of Total Awesomeness


Aida finished her tote bag!!!  Hooray!!!! And it is awesome! 
Aida has been working on this tote bag for months.  I now it seems like years to her, but really only months :). While working on it she had life  go all crazy on her:   job stress, she moved, etc.etc.  You name it. She came to see me when she could on Friday afternoons and we sewed. 
This bag is a testament to perseverance and persistence. She was going to finish it, damnit, if it took her the rest of her life!  So Super Kudos to Aida for sticking with the project that never seemed to end! 
We used my tote bag pattern and lesson.  This bag is made to the exact measurements in the pattern. We followed the pattern almost exactly except for a few additions. 

We added TONS of pockets!!! This bag has two water bottle pockets on the insides. The water bottle pockets have elastic on the top inside hem which holds the bottles in nicely. These pockets are also great for umbrellas, sippy cups, baby bottles,.....
There is a small pocket for her phone and a larger pocket on the other side  big enough to hold a library book!
This is  bag design genius to me: a place for water AND a library book. Sweet!  

View of the inside.  Look at how much space she has!

Here is a close up of the side bottle pockets.  That's a peppy  polka dot lining, isn't it?
Aida picked the polka dots because they made her happy :) :) 


Photo: Aida is pinning her straps on to her tote bag in lesson. Look at the lace on the pocket! How sweet is that? :)
Look at the super cute  lace on the pockets. This was a little bit she had left over from her skirt she made  out of this same material.  We added the lace to the top of the pocket BEFORE applying the bias tape.

We applied interfacing to the  outer body main piece. The fabric is lovely,  soft and  thick but it is a bit floppy. It needed a little bit of body.  By ironing on interfacing to the back of the face fabric, it gives the bag a little more body and structure. It can sit up all  on its own!


The outer material is reversible! She used one side for the main body and pockets of the bag and then used the other side for the straps. 

 We had talked about maybe adding a bottom to the bag, to make it  even more sturdy. She did it! She used a rectangle of Peltex, the super stiff  kind, cut to the dimensions of the bag after the corners were put in.  ironed it onto the bottom inside of the bag and then zig zagged around it to secure it into place. Then she added the lining and hemmed the top. 
The zig zagging barely  shows!


She did change the hem slightly from the pattern.  She folded it down 1/2 and then folded it again about 2 inches. The top hem of her bag is even with where the straps stitching lines are. It makes the bag a touch shorter but it gives it a really cute look on the inside. 


Aida also used this material to make a skirt . Here she  is modeling it.  


She later added lace to the bottom.  It just gives it that little bit of pizazz. 


Great job on your tote bag Aida!!!!
 I can't wait to get a picture of you wearing your skirt carrying your matching tote bag!!!

:) 

Wednesday, September 12, 2012

I made something I saw on Pinterest!

Yes, I did something I saw on Pinterest!! Yea me! 
I think there should be applause or trumpets or something  that sounds when you do something you see online. They could boast your accomplishment for you.   You could say " Hear that world?  These are the trumpets of productivity proving I am not just sitting here staring at pinterest for hours. "  
My life needs an applause and trumpet button.  Somebody get me one, ok? :)


I made this dress at the beginning of summer but never got around to posting about it.   It was a busy summer! Now that  E is back in school  I have much more quiet computer time. 
Today I have computer time because my car will not start. I am not going anywhere.  I had to cancel my appt with a student  that I was so looking forward to and am  really bummed. Sorry Carolann!! 
So with my new found free time today I will catch up on the blog! :) 

I really wanted to share this dress  because it was my go to dress all summer.  I would literally  pull it out of the dryer and out it on.   It doesn't need ironing or hand washing or any  attention at all. Just wash and wear. It is so comfortable. I love this  fabric - it  very soft.  The elastic makes it super flexible so I could do anything in it.  I wore  it to dinners out, dinners in, play dates, birthday parties, playing on the beach ( the ruffle at the bottom does get  unbelievably  heavy if you misjudge a wave and get wet- just a heads up for ya if you plan on making one and wearing it to the seaside),  going to see bands, end of summer camp programs,  grocery shopping, and   for hanging out at home. Oh and teaching lessons too- My students saw this dress weekly.   Kayla has pointed it out to me a couple of times that I wear this dress a lot on  lesson Saturdays.  :) Yes,  I have worn it most teaching days because it is easy to put on  at 8:30 on  summer Saturday mornings and look like I made effort to get dressed for work. Pulled it right out of the dryer...

Yep. That's Sophie behind me. Just hanging out. Chillin'. 

Here is the inspiration dress:


Isn't it lovely? When I pinned it  I  thought it would be a fantastic dress for summer.  And super easy. When I read the tutorial I realized that the pattern she used for the bodice was very much like  a peasant  top pattern I had for eden. I graded the pattern up to my size, which was gloriously easy: added  to the top of the neckline and sleeves, widened the back & front bodice, lengthened the sleeve and  lowered the armscye. That was it.
 I ordered the same fabric she used in her dress for mine but in black. Of course.  It is a black cotton gauze. It isn't stretchy, but due to the tiny folds in the fabric, it acts stretchy. There is elastic at the neckline, sleeves and where the bodice meets the skirt.


Again,  Sophie is standing behind me.  No pup head shots  at all  in any of these pictures.
 Just side dog. 

I had planned on adding the ruffles on each tier like my inspiration dress but on me, the ruffles just seemed bulky. They didn't look romantic on me. They just kinda made me look fatter.  So I ditched that idea and  just did one longer ruffle at the bottom of the dress.
There are three tiers  in the skirt , I just did not attach the smaller ruffles onto them. The gathering and attaching of the three tiers  and then the bottom ruffle TAKE. FOREVER. Seriously. A fraking long time.    But, I do have to say for this dress, it was totally worth it.  I want to make another one I just have not found the right fabric yet.   For the next dress I am only going to change one thing: I am going to use a different method for  the elastic at the waist. The tutorial says to sew the elastic onto the seam allowance on the inside and I am going to do that.  For this dress, I felt the because the skirt is a little heavy, I needed  a wider elastic. I made a channel out of the bodice seam allowance on the inside. It is ok,  I looks nice, I just want something less visible on the next one.

I love this dress.  Now, in September , it is showing the love. It has faded a bit. I am going to re-dye it black and  wear it all fall and winter.

At the neckline, I used a method from the Kids Peasant Top pattern. I folded the top hem to the inside  then sewed bias tape over that raw edge. I inserted the elastic though the bias tape.  The method gives you a  little ruffle at the top edge and I liked that detail. 

I love this dress  because the elastic keeps the dress close to my body. I can lean over without flashing!
And wow!  can you tell this picture is from the beginning of summer?  That is  one pale  face. :)  :) 


 My student April made this dress too this summer! She was a bit pregnant and wanted a comfy long dress. This fabric has tiny little silver stripes in it and was beautifully thin and breezy.   Doesn't she look lovely for  being almost ready to  have the baby? :)   She also chose to skip the ruffles on the tiers .


April also made a top from the pattern. She used an awesome pink and black plaid .    April decided after making the dress and the top that she was done with gathering and ruffles for a while. Luckily , she had a baby boy so she won't be ruffling any baby clothes.  :)  Baby Dalton is finally here and SO CUTE! He has the most adorable little baby chin you have ever seen :) :

Yea!  A photo with Sophie's face in it- not just her side!


Wednesday, August 22, 2012

Peacocks and Paisleys - Naney's Birthday dress

My niece Naney turned three recently and I made her a birthday dress!!
I made a test run in the spring- the Puppies And Kitties Dress.  I made a couple  of changes to the fit: lowered the armscye, took  in an inch at the neck so it didn't gape and made it longer. And it is perfect!
 I used the Olivia's Best Dress as a base for this dress. I used the little ruffle sleeves from another toddler dress and the band at the bottom of the bodice idea from the Bebe dress. I  call this Franken-sewing; mixing and matching pieces from different patterns. 

The Olivia dress calls for using 7 fat quarters. I couldn't find enough  co-ordinating fat quarters so I had  to get a couple of the fabrics in half yards. That worked out better as I had more freedom in choosing what fabric went where. 
On vacation this summer I asked Naney what her favorite color is. I wanted to make the dress in her favorite color. Well, it was green one day and then  purple the next. On the last day at the beach she leaned over to me and whispered that her favorite color was red!  So with these fabrics, no matter what her favorite color is that day,  it is on her dress! :)
These fabrics can also be worn at any time during the year. With the lower armscye, Naney can wear her dress over t-shirts or even turtle necks in the winter.  And these colors will be so cute in the spring!

 
My favorite fabrics on the dress were the peacock fabric and the paisley.


I put a label in the dress so she knows when it was made just for her. On vacation this year, she accidentally called me Uncle Stacye, and it stuck.  I think it is adorable! I will happily be Uncle Stacye! :) :) 
So I put that in the label too!  How fun when she is bigger to have her little funny sayings inside her clothes. 
The neckline is topstitched in a fun swirly stitch. This helps to keep the lining in place. 


The bottom hem is also  topstitched in a decorative stitch. It is hidden in some of the busier fabrics but you can see it pretty well here on the stripe.

Here is the inside. I stitched the strips together with a small seam allowance, trimmed it and then zigzagged over them together.  This should help the dress not need to be ironed as much- no seams to press open.   


 The little sleeves are so easy to create on little  dresses and top. Draw a large oval. Press it in half lengthwise.  Run a gathering stich along the raw edge- gather and insert!

I had a couple of people ask me how long it took to make this dress. It  looks like it is a time consuming dress but it really isn't. I have made a bunch of this style dresses and so I have the order of construction down pat.   Putting the skirt together is all straight stitches and  zig zags,  and it went by pretty past. 
I would say this dress took about 4 hours. it took longer to choose what fabrics to use!

 Here is the birthday girl modeling  her dress!!!

Spinning around....

Go me- it's my birthday! Go me!

Happy Birthday to me!


 All that twirling makes you thirsty! Gotta have a juice box!
I love the look of total concentration,  trying to get the straw inserted in the box.

Happy Birthday Naney!